Advanced Laser Cutting

Here are some interesting examples of laser cutting where software techniques are used to slice a 3d computer file into 2d shapes to be cut for re-assembly as a physical model.


The free Autodesk software 123DMake (discontinued) will import a 3d file (.STL) and then generate 2d cut-able parts that are used to construct the model. It can do this in a variety of styles:

Stacked Slices

The model is simply divided into slices that are assembled on top of each other to form the shape.  Typically the model is sliced horizontally but the software does give the option to change the slice angle so the shapes run front to back for example.  This is the easiest type of model to assemble and gives the most accurate form, it’s likely to create the most amount of cutting though

stackedslice-3ds

This was a quick 3d studio model (render on right) – a lofted circle shelled with much twist / bend / taper modifiers applied to it.  The laser cut model looks (and feels) a lot better than the stark flat computer render.

stacked-zaha

A version of Zaha Hadid’s Heydar Aliyev Centre in Azerbaijan.  The 3d model was downloaded from 3D Warehouse and fixed in 3D Studio (3d Warehouse models often need repairing before they are ready for cutting).

stacked-skulls

A skull model that was actually captured using iPad 3d scanner software (another free piece of Autodesk software called 123Capture).  This takes many photos of the shape and creates a 3d file from that information.  The file can then be brought into 123DMake and made into cut layers.

In this model each layer has been padded with a piece of card – that card should actually have been thicker as the skull still looks a little squashed.  On the right is a photo of the same model (proper dimensions) printed on the z450 3D printer.

stacked-head

This model was printed on 1.5mm grey card and gives a quite smooth version of a head.  The model has been smoothed on the right hand side by sanding and Dremeling it down – however the dirty, rough non sanded version is has a nice textured quality that is lost on the clean and smooth version.

Slotted Slices

In addition to the relatively straightforward stacked slices the 123DMake software can also generate model cuts in a more figurative way:

slotted-slices

In this image the model on the left is the original followed by three possible variations of “interlocked slices”, “curve” and “radial slices”.  The parameters for each can be tweaked to alter the number of slices and spacing – this could be useful for mimicking floors / storeys in a building model.

Here is a real version of a radial sliced model, using 1mm grey card.

slotted-head

This radial slice version of the “Walkie Talkie” building in Fenchurch Street London had a shell modifier in 3D Studio applied to so it is just a thin hollow shell. The slice operation then creates a skeletal form rather than solid planes.  The result is quite striking and only uses a small amount of material.

lasercut-walkietalkie

These types of models do use less material but they are more difficult to assemble – like a 3d jigsaw.  With complex shapes with gaps in the middle slices have to be put together in a particular order – the software in fact has a feature where it will show the order to put them in.

The slot models are less detailed than the stacks and are not suitable for all situations for example if more detail is needed.  They can make for very interesting conceptual models though.

Folded Panels

The software also has the option to create a paper model version that can be folded and glued together.  It is an appealing idea for quick, cheap paper models but the reality is that it’s only the simplest of shapes that produce a usable result.  Here is what the software makes of head shape and simple house shape

folded-slices

The head would be quite difficult to fold together correctly and probably would not give a great result.

Materials

These models could conceivably be cut on any laser-cut material, e.g plywood, acrylic, cardboard, etc. – the software does allow for the required layer thickness to be altered to match.  For the slot models it is a lot easier to work with a material with some flexibility like card rather than a rigid material as the parts do need to slide together and interlock.  For a more advanced project a mixture of materials could be used, for example wood for the horizontal slabs and clear acrylic for the uprights.

The interlocking models ought to fit together with no glue needed whereas the stacked models do need to be glued – this can take some time and patience.   Complex multi layered models would also mean a lot of cutting so although a cost saving could be made on using cheap materials like cardboard, the actual cutting time can be long, especially when multiple sheets area required to be cut.

3D Print Preparation

Note: This guide refers to the z450 3D Printer and its specific software Printer but the general techniques and ideas are appropriate to both machines.

Before models can be printed on the z450 3d Printer they need to be converted to “.zbd” files.  This file type is used by the 3d Printer’s “zPrint” software.  zPrint can import a wide range of 3d file formats, but the following three are common and recommended:

  • STL – Stereolithographic
  • 3DS – Autodesk 3ds
  • VRML – Virtual Reality Modelling Language

All 3d software can export with at least one of these file types as an option; in fact some software includes a “publish to 3d printer” option.  Here are some examples of generating zPrint friendly files:

Sketchup Pro:

File – Export – 3D Model [Export Type: 3DS File]

Rhino

File – Print 3d – Z Corp ZPrint

If Rhino detects zPrint software is installed then it exports the model as a vrml file and opens straight into zPrint

OR

Select the object then choose

File – Export Selected – [STL/VRML/3DS]

AutoCAD

File – Publish – Send to 3D Print Service – Continue – [select model]

Saves as STL file and tries to connect you to online 3d printing service which you can cancel; the STL file is saved and importable into zPrint

OR

File – Export – Other Formats – [choose Lithographic STL] – [select model]

3D Studio Max

File – Export – [STL or 3DS or VRML]

The zPrint software is installed on all machines in the digital studio; it is also available to students who want to install it on their own machines.

Bring the Model into zPrint

When you have your STL/3DS/VRML file you can bring it into zPrint. In zPrint select

File – Open – [select the file]

zPrint shows you details of the model you are importing

If the model comes in at a size that will fit into the 3d printer then the file opens straight away, otherwise you get an extra dialogue box prompting you for resize options.

If you know the actual dimension you want the model to print out at, you can enter them here – note these are dimensions of the overall extent of the model; the total height, width or length that the model reaches.

Alternatively you can just put in a percentage figure – this is useful for making the model to scale; i.e if you modelled correctly in Autocad then you can bring in a 1:100 version by setting the scale at 1%

Don’t worry about getting your figures exactly right here – it is still possible to rescale the model after it has been brought into zPrint by right clicking on the model and selecting scale. 

You can swap between the units of inches or mm by selecting

Settings – General Preferences

Checking the 3D Model for Errors

By far the most common problem with preparing 3d models for printing is flipped normals, also referred to as reversed faces.  This is when one or more surfaces of the model is “inside-out”.  Even though a model with flipped normal may still render properly it will cause problems when 3d printing.  A flipped normal in zPrint is indicated by a dark area: Here’s a correct and incorrect model brought in from Sketchup

Correct and Printable
Incorrect and won’t print Properly

An additional tool in zPrint allows you to view the cross section of the model – you can slide a section line up and down to view how that layer of the model will appear to the printer.  This should show solid black areas where there is something to print.  Viewing in this mode is very useful as it can really highlight problem areas – the 3d imports don’t always work and using the section view lets you view and check exactly what the printer will send at each layer.

Select this viewing mode by selecting the 2D button to the right of the tool bar

In the screenshot above you can see that the software is misinterpreting the model at that section point – there are two white voids running through the model, which should not be there; the presence of a flipped normal elsewhere has thrown out another part of the model. If this model were to be sent to print it would print wrong.

Fixing Flipped Normals

Simply put, it is a lot easier if there are no flipped normals present in the first place.  There are tools in 3D software to reverse faces but unless they are simple it can be time consuming and frustrating to attempt a repair – it may work out easier to remodel the incorrect part.

Here are some pointers to repair options [Note: often fixing one face results in another face somewhere else in the model that was correct then becoming incorrect]

  • Sketchup:
    change View – Face Style to monochrome, and look for blueish grey faces. You can right click on these faces and choose Reverse Faces.
  • 3D Studio:
    select the part and choose the normalise modifier and Unifiy Normals
  • Rhino 3d
    type “flip” and select the surface

Pricing the Model

Cost of the final model depends on what volume of powder is used in making it. At time of writing [autumn 2010] the price is £2.50 per cubic inch.

In zPrint you can find out the volume of your model [after setting the units to inches] by selecting

View – Calculate Part Statistics

In the example above the total volume of parts is 8.38 cubic inches;

8.38 x 2.5 = £20.95

You can reduce the cost of your model by:

  • Scaling down the size of it: right click the model, select scale and put it at 75% will bring the volume / price down considerably (though be sensible about how useful a much smaller model would be)
  • Add voids: a solid box will be a large volume and cost a lot but if you subtract a block out of the bottom of it then that is that much space that you are not printing. Two important notes here:
    • Don’t void it so much that the walls are all wafer thin as it will break
    • Don’t void the inside of a shape without leaving a weephole for the loose powder to get out – the 3D printer will re-use any loose powder left over from a build, but if the powder is sealed inside a box then it can’t be extracted.
  • Shell it: the 3DS Shell modifier can sometimes help by allowing you to thin (and thicken) walls, though again be careful not to trap the loose powder inside walls.

After the Model has Printed

Typically a model is sent in the late afternoon to run overnight.  3D prints can’t be queued so they all go one after the other, but it is possible to put a number of models into one build so they can be sent altogether.

The next morning the model will be sitting in the printer build tray inside a cube of loose powder.  That loose powder then has to be manually vacuumed away leaving the solid model.

Next, the model is moved to the air brush area where remaining powder is blown away.

The final – though not always necessary – step is to apply a hardening solution (which is essentially superglue).  This is either administered with a brush or by dipping the model into a small trough filled with the solution.


FoACH :: SwS :: UoG :: Faculty TechSupport

Information, technical support, guides and news for students using facilities in the University of Greenwich Stockwell Street S11 Building.  This site is primarily for students in the departments of Architecture & Landscape and CPDA
SwS-Facade-650

Location

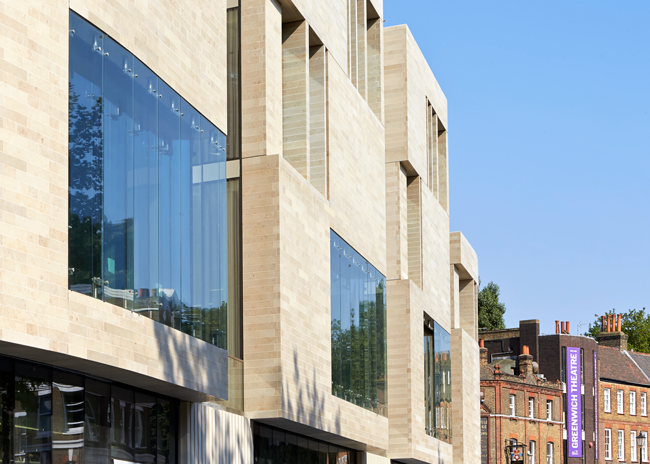
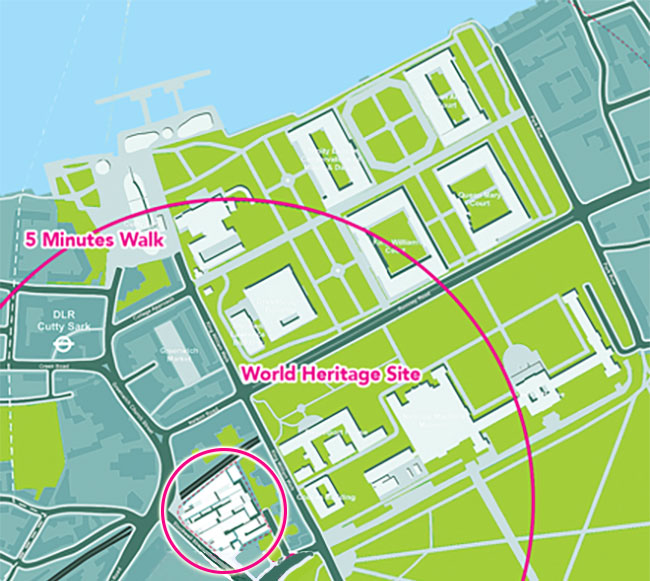
Our building is located in the heart of Greenwich, the newest addition to a suite of magnificent buildings that occupy the UNESCO World Heritage site and the location of the Greenwich Prime Meridian.  Designed by the award winning architects Heneghan Peng students have easy access to all of London’s vriety and energy and the benefits of one of London’s most beautiful riverside locations
SwSMap

  • University of Greenwich
  • Faculty of Architecture, Computing and Humanities
  • Departments of Architecture & Landscape and CPDA
  • Stockwell Street S11 Building

Facilities

There are a number of specialist facilities in Stockwell Street provided and supported by the Faculty for its students

These Faculty run spaces are in addition to the shared provisions of Information and Library Systems (ILS).  General information about central ILS facilities can be found on the ILS information page.

For queries about the technical support in the Faculty space please mail either