


A vinyl cutter is a computer-controlled machine that uses a small blade to cut out vector graphics. It is possible to print images but you must first convert them into vector images. There are 4 sections to creating your vinyl decals; designing your vinyl decal, cutting it on the vinyl cutter, weeding (removing) all excess vinyl that is not needed in your design and applying your vinyl decal onto a surface.
There are three main types of decals/stickers you can make with the vinyl cutter; a positive decal is created by removing the background, a negative decal is created by removing the foreground (think of it as a stencil) and a print & cut sticker which is when you print onto vinyl then use the vinyl cutter to cut it out.
The vinyl cutter is located in the printing area in the design studio on the 1st floor of the Stockwell Street building.
If you are able to, it is advised that you take your work (once you have finished with the vinyl cutter) back to your work area as weeding (removing) excess parts of the sticker can take a while.
Software
The computer that controls the vinyl cutter is located to the right of the vinyl cutter and should only be used for sending your design to the vinyl cutter.
You may also install this software onto your own laptop and connect straight to the vinyl cutter via USB – this can be a better / quicker route to using the cutter
The software to connect to the vinyl cutter is called Graphtech Studio, this is free software which will run on Mac or PC:
MAC http://www.graphtec-ss.jp/dl/gs/gs_std_en_m.html
PC http://www.graphtec-ss.jp/dl/gs/gs_std_en_w.html
Before you use the vinyl cutter you will need to;
- Create your design in a vector based program such as Adobe Illustrator
- Buy your vinyl/material. The vinyl cutter blade can cut up to 0.25mm. The materials you can use on the vinyl cutter are vinyl and paper (as long as it is no thicker than 0.25mm).
In most projects you will need;
- A scalpel
- Low-tack masking tape (which we can provide)
- Vinyl (which you should provide)
- Plastic application squeegee (this is not essential but will help to push the air bubbles out when you apply your sticker. We only have one which will need to be returned).
- Create your vector based graphic/text
- Export your image as a .DXF file
- Open Graphtech Studio
- Open your .dxf file – By default the software will not see .dxf files, use the drop down box to make them visible
- Load your vinyl into the vinyl cutter
- Setup your file and the vinyl within the software and send to cut
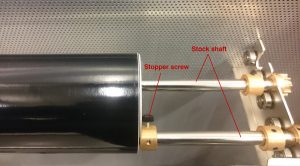
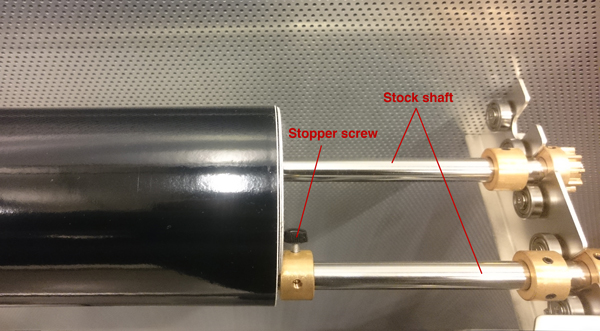
If you have a roll;
- Secure it on top of the stock shaft with the stopper screws so that it does not fall off or move from side to side.
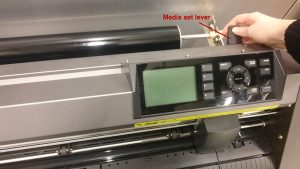
 Lower the media set lever and feed your vinyl through. Pull it so that there is no slackening in the vinyl. Pull the vinyl so that it completely covers the sensors.
- Position the push rollers inside the edge of the vinyl. The push rollers have to be positioned above the grit rollers to avoid movement when the vinyl cutter is cutting.
- Pull the media set lever back up to secure the vinyl in place. Once the set lever is up create the same amount of slack in the vinyl as will be used in your project.

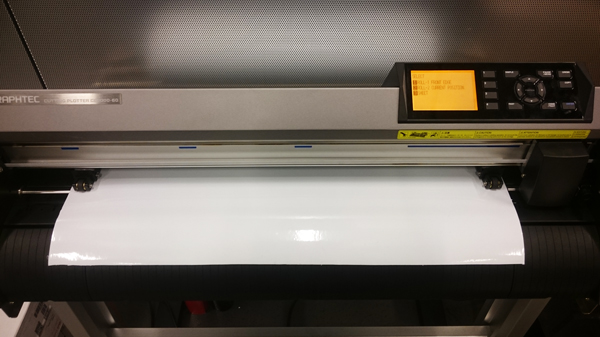
If you have a sheet;
- Lower the media set lever and feed your vinyl through. You will need to pull the vinyl so that it completely covers the sensors.
- Position the push rollers inside the edge of the vinyl. The push rollers have to be positioned above the grit rollers to avoid movement when the vinyl cutter is cutting.
- Pull the media set lever back up to secure the vinyl in place.

- Set a feeding method
On the vinyl cutter screen you will see 3 options.
1. When using a roll; Select ROLL-1 SET FRONT EDGE by pressing the [1] key, this will find the leading edge of the vinyl for you.
2. If you want to specify where it starts cutting; Select ROLL-2 SET CURRENT POSITION by pressing the [2] key.
Useful if there is previous work or damage at the leading edge
3. When using a sheet; Select SHEET by pressing the [3] key, the vinyl cutter will detect the leading and trailing edge of the sheet which will send the data to Cutting Master 3 and change your paper size to that which you have loaded.
 (Optional) Run a cutting test to check the length of the blade
The test will not take up too much vinyl as it is a small square with a triangle inside
If the blade cuts through the backing sheet or the triangle has curved angles the blade length is too long. If the film does not get cut completely then the blade length is too short.
If there is a problem with the blade please find a member of staff.
- Ready to start cutting
Make sure to check your design once more before you click print. When finished the blade will be positioned behind your design.
If you wish to cut another design next to or behind it you will need to reposition the tool carriage using the position keys (to make the tool carriage move faster, press the fast key simultaneously with the position keys).
- Taking your work
When using a sheet; lower the media set lever and pull your vinyl out
When using a roll; pull the vinyl until your design is clear then using either a scalpel or scissors to cut the vinyl
When using a scalpel please cut over the cutting groove so you do not damage the machine
When using scissors, try to cut in a straight line to avoid wasting vinyl
- Remove the positive/negative excess material
You should use a scalpel and carefully remove the parts of the design that are not required.
- Sticking your vinyl sticker onto something
1. Evenly and smoothly apply low tack masking tape to the front of your design (this will make it easier to apply your vinyl sticker to the surface you are planning to stick it to).
2. clean and dry the surface which you want to vinyl to stick to
This is so that you don’t have lumps behind the vinyl sticker
3. Remove the vinyl backing
4. Slowly apply the vinyl sticker to your surface using a plastic application squeegee to remove the bubbles.
If you crease the vinyl remove it quickly before it sticks and try to reapply it smoothly (this usually only works if you have not stuck the entire sticker down or you are using soapy water as a lubricant to give you more time and more ability to move it slightly)
Advanced Instructions
Weed Settings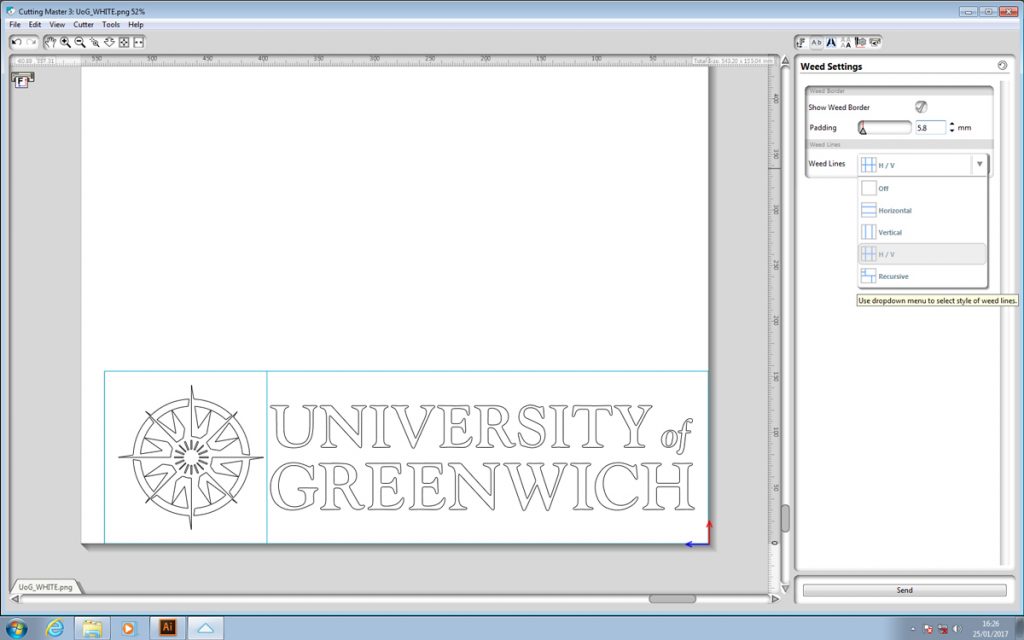
Clicking show weed border in weed settings will create a box around your design which the vinyl cutter will cut out. This is beneficial when removing the excess vinyl. By clicking on the weed lines drop down box you can choose more options that can help simplify the excess vinyl removal process.
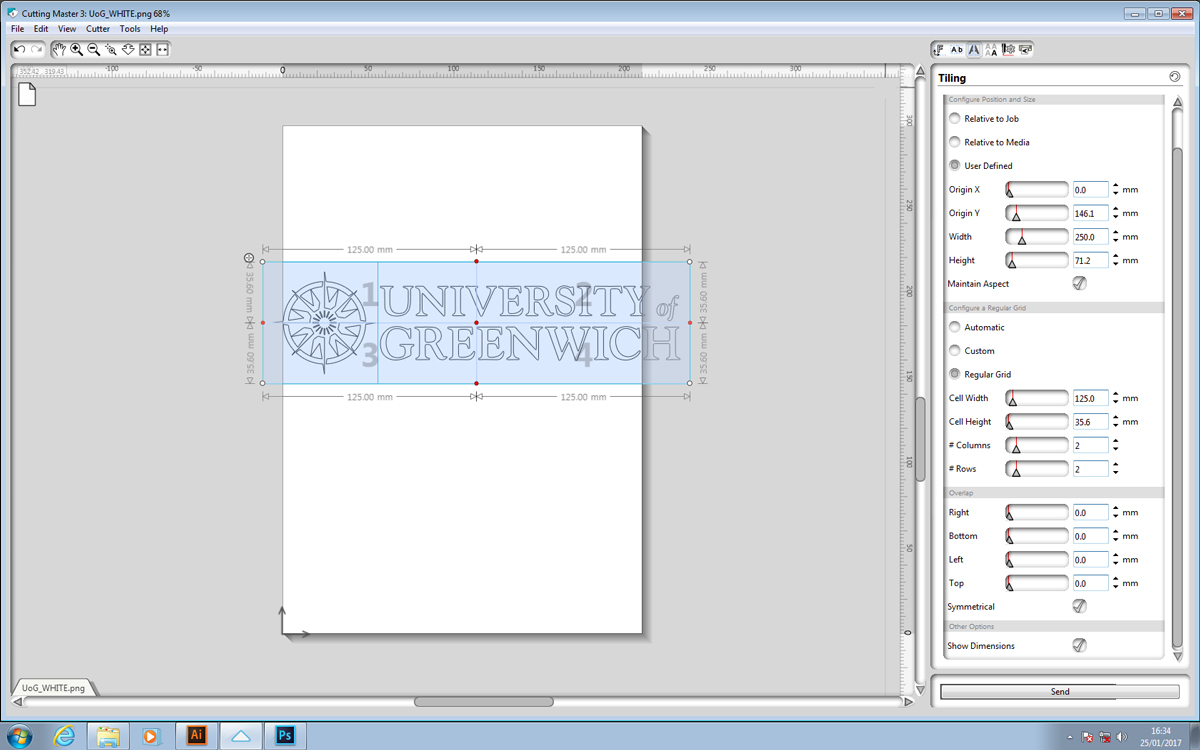
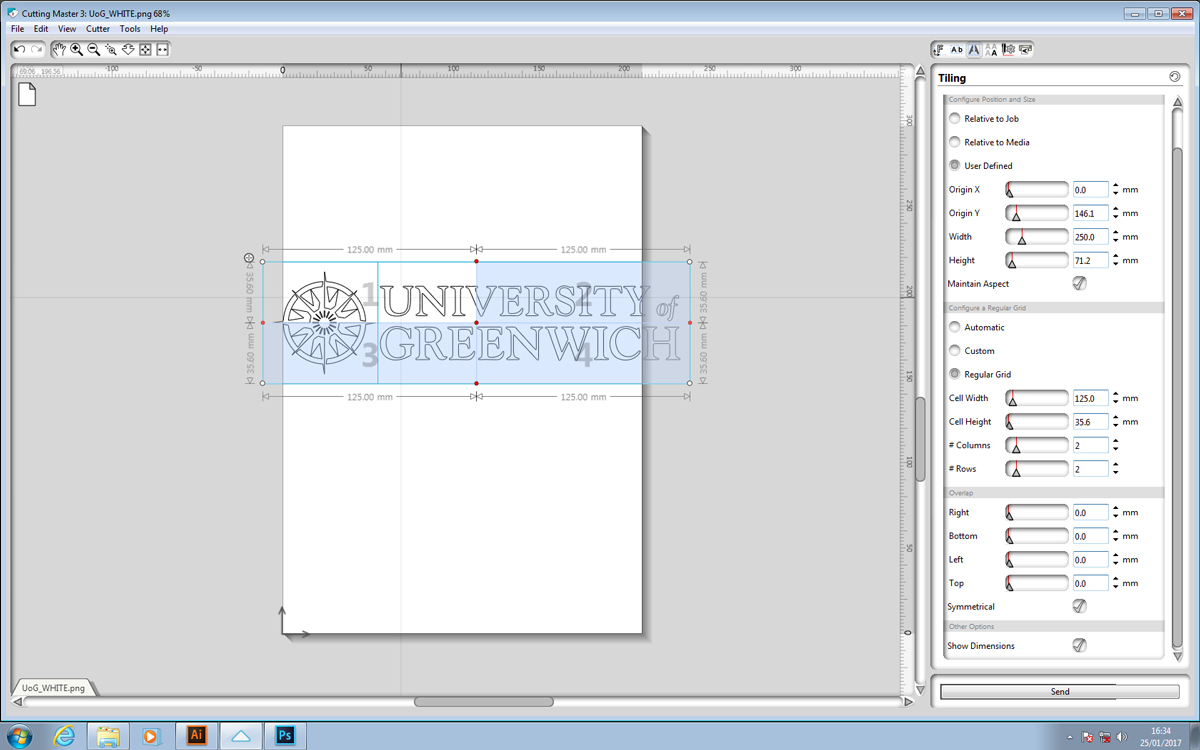
Tiling
Tiling is useful when your design is bigger than the vinyl you are using (or the vinyl cutter). Each tile will be cut as a separate job. You can visually adjust the tiling pattern by clicking and dragging the grab handles that appear on each corner. The red grab handles are used to adjust the tiles within the pattern (this is useful to make sure the tile doesn’t split a letter or object). You can add more tile lines by clicking on an edge of the tile and dragging the line down so that it connects with another tile line.
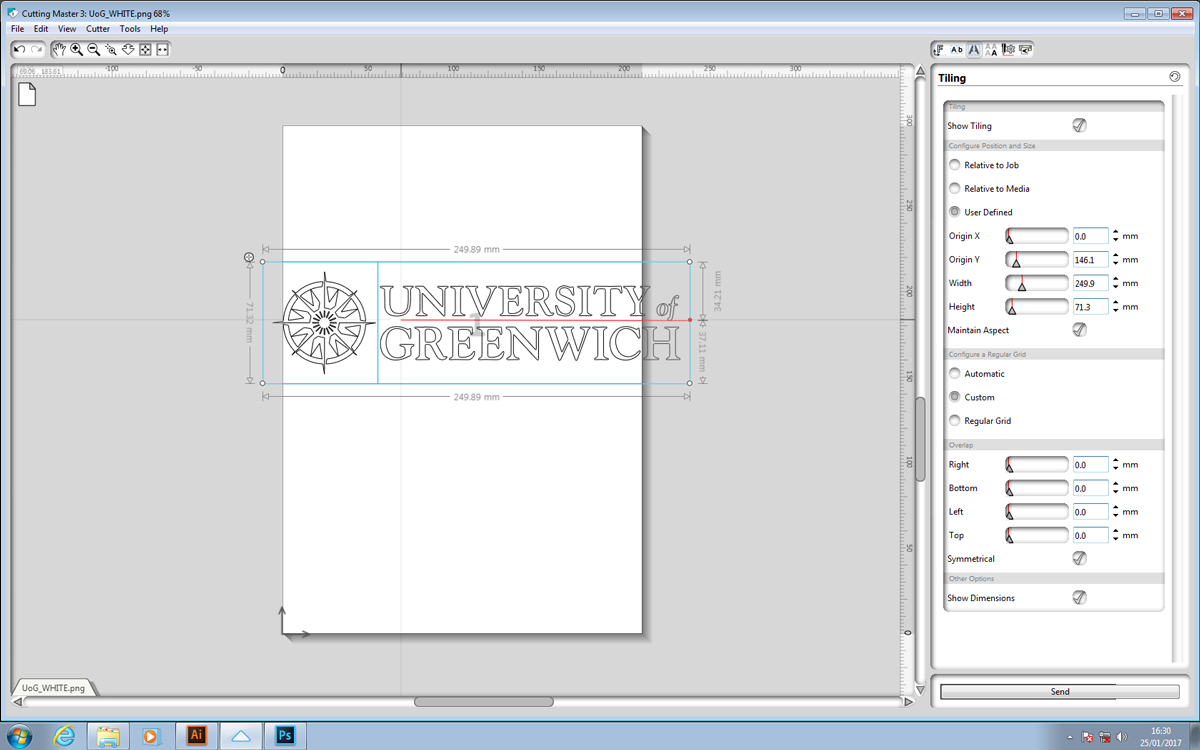
Configure position and size – Move the position and adjust the size of the tile as a whole. Clicking Maintain Aspect will keep the tile proportional.
Configure a Regular Grid – Automatic, Custom, Regular grid- set the tiles evenly, this will give you more settings underneath when clicked.
Overlap- eliminates any gaps between the tiles when assembling them together
If you want to cut just one tile, you must disable the other tiles that do not need to be cut. To disable a tile just click on it. Once it is no longer highlighted blue, you know it has been disabled.
Matrix Copies
This section will allow you to cut your design numerous times without wasting too much vinyl. You can increase the number of copies by increasing the number of rows and columns.
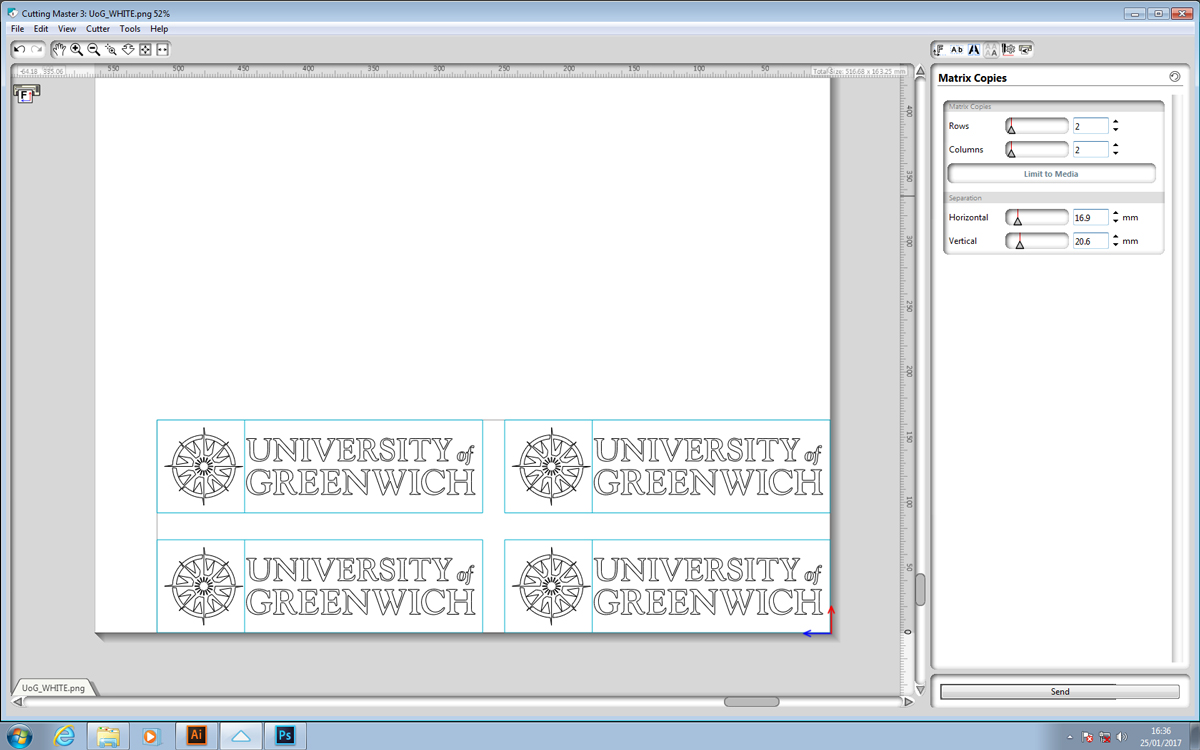
When you are able to please increase columns rather than rows to avoid vinyl wastage.
Limit to Media will make sure the copies you have selected do not go outside of the media width or height.
The separation settings will increase and decrease the spacing between each copy of your design.
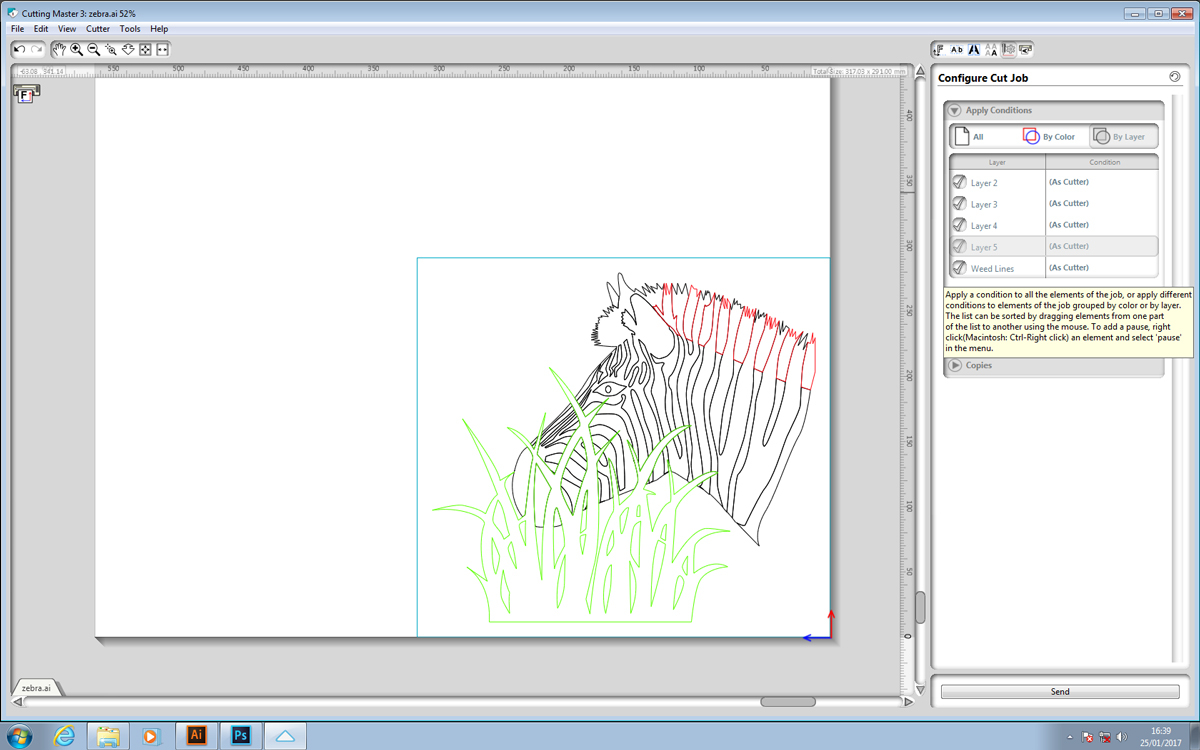
Configure cut job
Apply conditions
This allows you to choose to cut “All” the graphic lines in your design. “By Colour” allows you to cut different colours of the design. “By Layer” allows you to cut separate layers. This is useful when you need to cut different layers of your design in different vinyl colours.
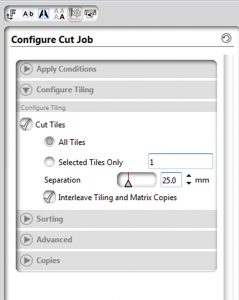
Configure Tiling
Cut tiles- You can disable tiling by clicking on the “Cut Tiles” check box, this is used when you need to see your design as a whole rather than viewing it in a tiled format.
All Tiles/ Selected Tiles Only allows you to choose which tiles you want to cut
Separation – Allows you to change the distance between the tiles being cut
Sorting
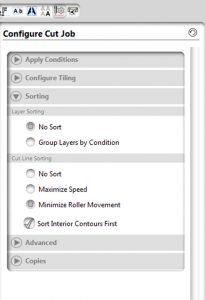
Allows you to choose how the vinyl cutter cuts your job (useful when you want to maximize the speed or minimize the roller movement.
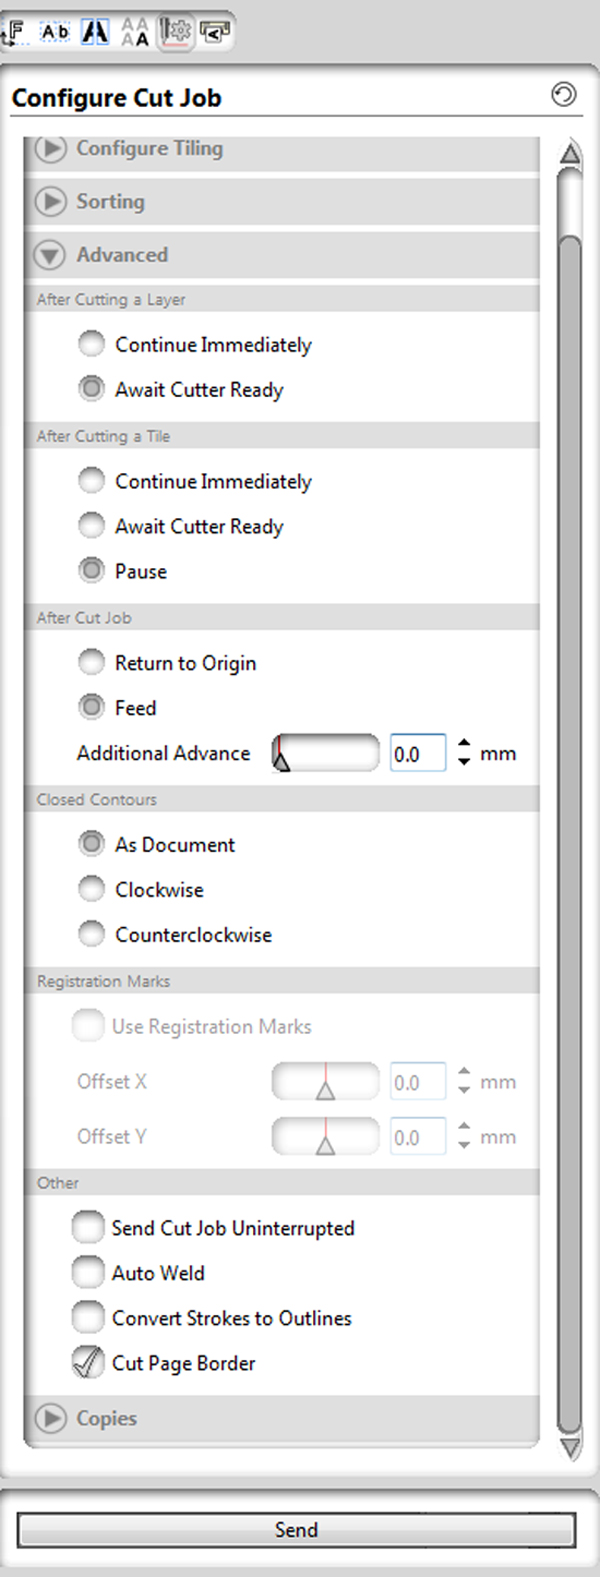 Advanced
For the “after cutting a layer” and “After cutting a tile” settings it is best to leave them in the default settings
After cut job
Return to origin- the tool carrier will return to the front right hand side of the vinyl which is useful is you have forgotten to add copies (if “Feed” is selected and you send another job straight away, it will start from where it finished cutting the last job which will waste vinyl)
Feed- This is the default setting and can be useful if your design has used the entire width of the vinyl and you would like to cut another design without having to remove you first design.
Additional Advance- When increased, this setting will make the tool cartridge leave more space behind the job that has just been cut.
Other
“Send cut job uninterrupted” will send all the design data to the cutter without pausing or stopping.
“Auto Weld” automatically weld overlapping objects in the job design if you have forgot to in the design software.
“Convert strokes to outlines” if you have forgotten to change them yourself in the design software.
Registration marks
Registration marks are used when you have printed a design using a laser or inkjet printer and then want to cut it out using the vinyl cutter.
If printing on sticky backed vinyl, please ask a member of staff to help you as they will need to change the roll in the plotter.
- Transfer your design to Adobe Illustrator to create the registration marks (this must be done on the vinyl cutter computer).
- Make sure you have separate print and cut layers
- Add Registration marks to your design
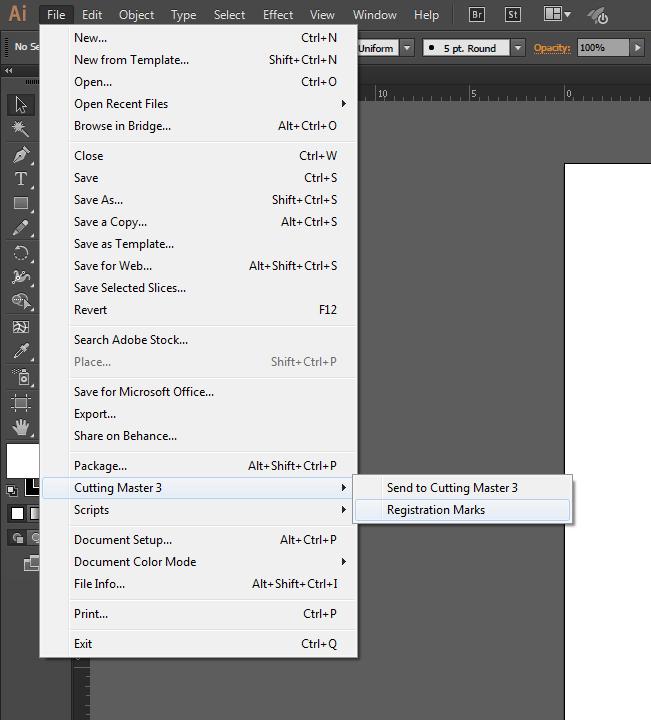 Click File – Cutting Master 3 – Registration marks
This will bring up the registration Marks window where you can select your style of registration mark; the length (important for longer job designs) and thickness (important for jobs with lamination); and the space between the cut path and the registration marks.
When cutting longer designs it is best to use segmented registration marks, this helps the vinyl cutter find out if any bowing has occurred in the printing process and it then adjusts to compensate.
You can also make registration marks by drawing a rectangle around your design then going to this window and clicking “Convert rectangle”.
Registration marks MUST NOT sit under the rollers as they will not be sensed. To avoid this make sure the registration marks are at least an inch from all media edges.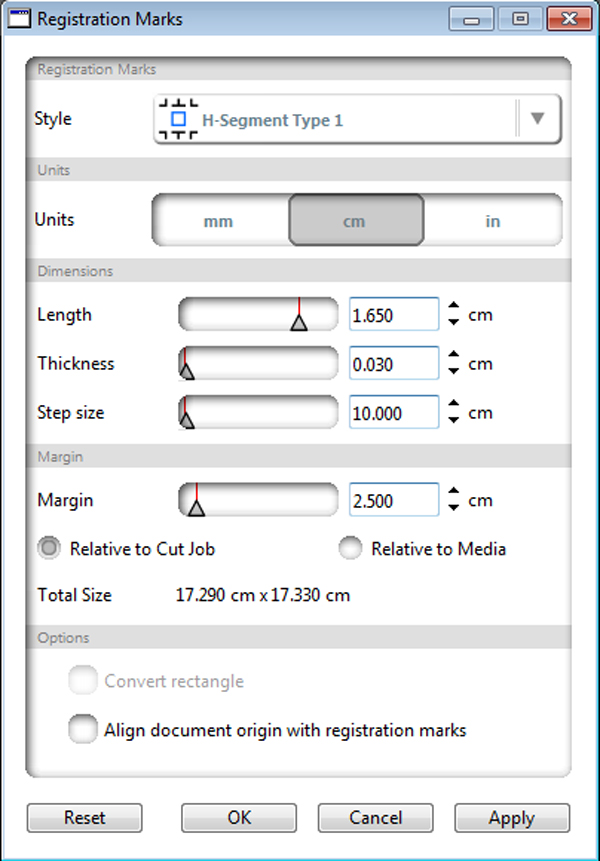
- When you are ready to print your design with the registration marks, make sure your “cut layer” is not visible.
- After printing your design you must feed it into the vinyl cutter. Use the front panel edge as a guide when lining up the registration marks to make sure the print is aligned straight.
- Once you have secured your media by pulling the media set lever up, press 3 “Sheet”.
- You will then need to use the arrow keys to position the tool cutter near the first registration mark (the first registration mark is the front one nearest to the control panel).
- Make your cut layer visible in Illustrator then load your design into Cutting Master 3
- Turn off your print layer – Configure Cut Job- By layer- untick your print layer
- Click “Send”