Start – Autodesk Recap Photo (Not Autodesk Recap – that’s different)
When prompted to sign in you will need to use an Autodesk Education account that you must have already created. If you do not have an Autodesk Education account you can create one for free at:
students.autodesk.com (use your .ac.uk Uni mail when signing up).
For regular models and sites use the “Object” button to start your project; browse to your folder of photographs to select them.
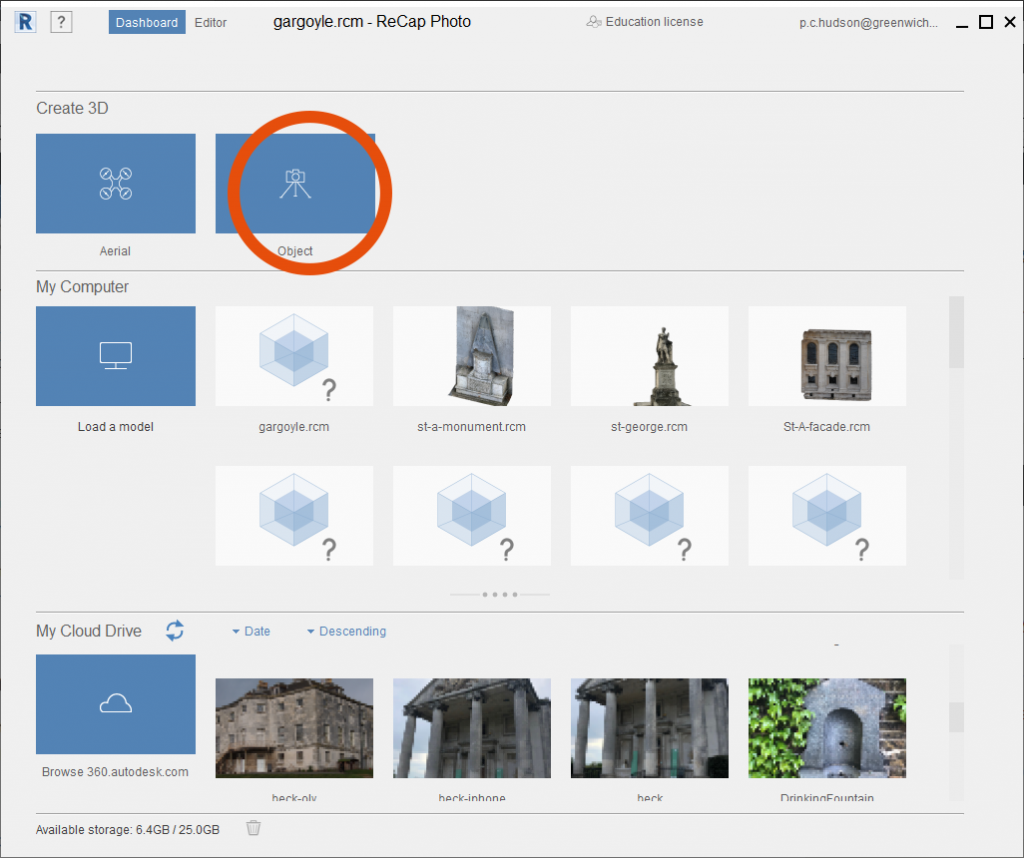
– You must add more than 20 and less than 100 images.
Click the AUTOCROP box when prompted – this will attempt to identify objects in the background of your subject and exclude them from your project (perhaps not suitable for sites).
Clicking Create will then UPLOAD all of the photos to the Autodesk servers, and then put your project in a queue.
Note: the project will be processed online – you do not need to stay logged in to the machine while you are waiting in the queue, you can just return to any machine later on and view / download the results (you will receive an email when your project is complete).
Once the model is ready you can double click it to download it for viewing / editing in the Recap Photo Editor
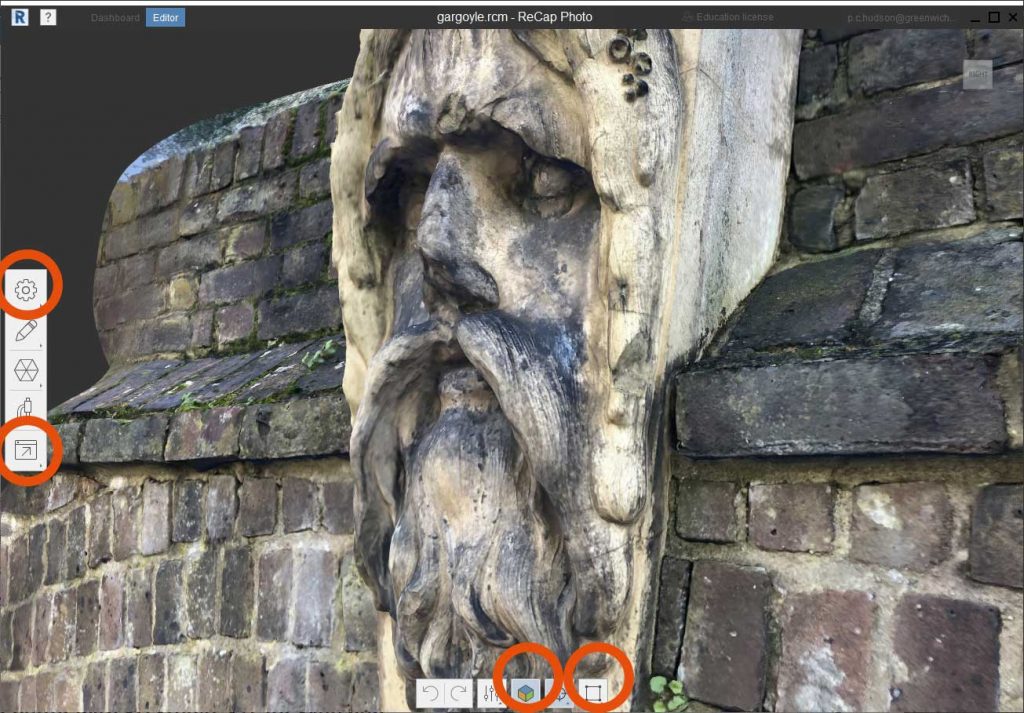
Some of the useful tools in the Editor:
Transform: (rotate the model if it has come in upside down)
Export: save as 3d model, or capture the current view as an image – or even generate a quick video of the model.
Visualisation: view the model as wireframe, solid, mesh, etc.
Select: pick parts of the model to cut off and delete
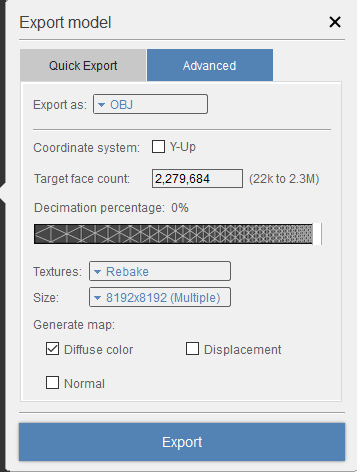
To export this model for use in, for example, Rhino do a QUICK export; export for Blender (OBJ). Medium setting is likely to be fine.
FBX files often work better with 3D Studio, STL for Sketchup.