Availability / usability:
- CloudCompare is installed on all the Stockwell Street Building 11 PCs
- This software is free / open source, available for Mac or PC – from www.cloudcompare.org
- Point cloud viewing / processing with lots of useful features – including Point-to-mesh conversion.
Operation guide:
CloudCompare is a point cloud registration / interrogation tool and it also allows you to do other useful operations like subsampling to reduce size and do quick visualisations and animations.
When bringing files from Recap Pro use the PTS or E57 file format as Cloud Compare can read these – it won’t read Recap RCS or RCP files.
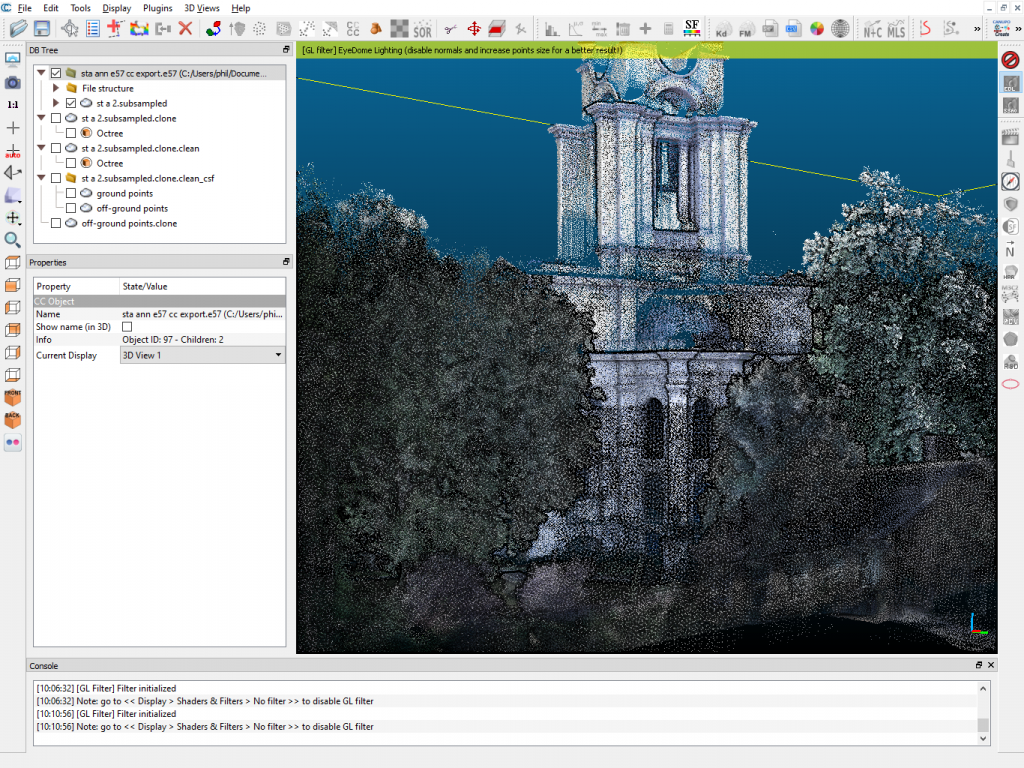
Most operations in CloudCompare will spawn a new “child” object, e.g. if you do a SubSample a new version of your point cloud will appear in the DB tree (top left). You can toggle visibility or carry out operations on that version, etc. This is important to get used to – there is no UNDO function in CloudCompare
These are some of the most useful tools for common point cloud operations:
- Change the Look: [Display – Shaders and Filters] quickly change the look of the point cloud with the EDL or SSAO filter. Or try a different point size in the Point Size property of the object
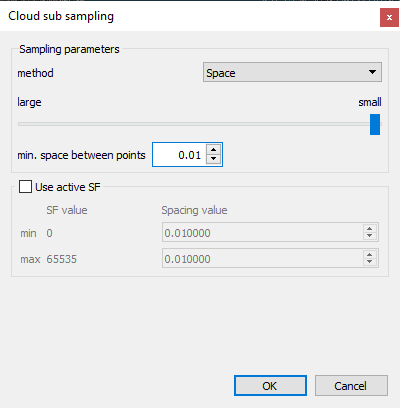
- Cloud Sub Sampling: [Edit – Subsample] This reduces the complexity and size of the file by reducing the number of points – while still maintaining the shape.
In the MIN SPACE BETWEEN POINTS field a larger number will produce a simpler smaller result and a lower fractional number leaves it larger.
- Clone: [Edit – Clone] Create versions and iterations of the point cloud for experimentation, or blending – for example split tree areas from the building area of a scan then subsample just the trees and so show the building more clearly. Note it is a good idea to clone before an operation as there is no ctrl-Z undo
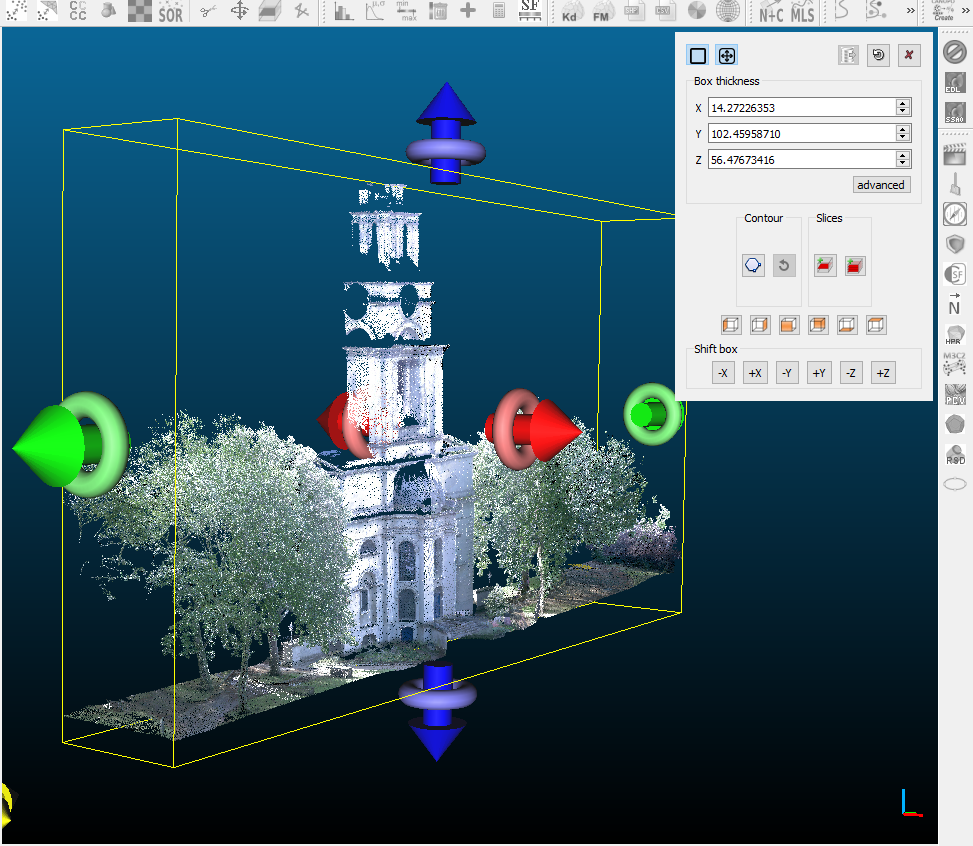
- Create Sections [Tools – Segmentation – Cross Section]. Cut out sections (as new child iterations) on any plane with any thickness by dragging or typing in limits
- Erase points: [edit – segment] Select by rectangle or polygon areas of points to delete. Note this process is a little fiddly – it is easier to select / delete using Recap Pro
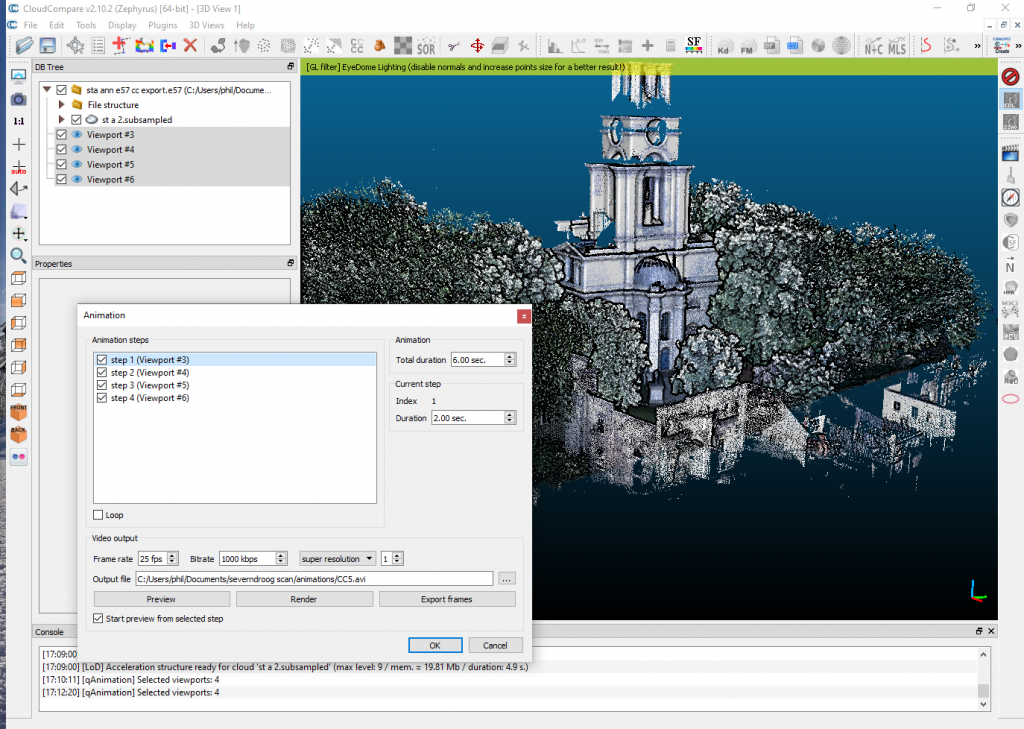
- Animation: [Plugins – Animation] You can create basic animations by moving to a particular point and selecting Display – Save Viewpoint as Object. Repeat this for each view / keyframe. Create an animation between these points by selecting them all in the DB tree and choosing Plugins – Animation to preview or to render out as a movie
Point Cloud to Mesh Conversion
Note: converting your point cloud to a mesh that can be edited directly in Rhino, 3D Studio, etc. is very rarely a perfect operation – they are just not interchangeable 3d formats. The result will often look like melted wax with surfaces incorrectly merged or holes – if it works at all. Consider using the point cloud in its raw form if you can, or as a background / marker for creating new geometry.
To convert the cloud follow these steps:
Optimise – point clouds can be huge, the operations will work quicker if you have slimmed the file down using the sub-sampling tool first.
Segment – throw away anything you will not need; crop it down to just the section of model required
Clone – the object, in case it goes wrong
With the model selected (and highlighted) first calculate the normals for the cloud (this works out which is the “outside”, which is the “inside”)
Plugins – Hough Normals Computation
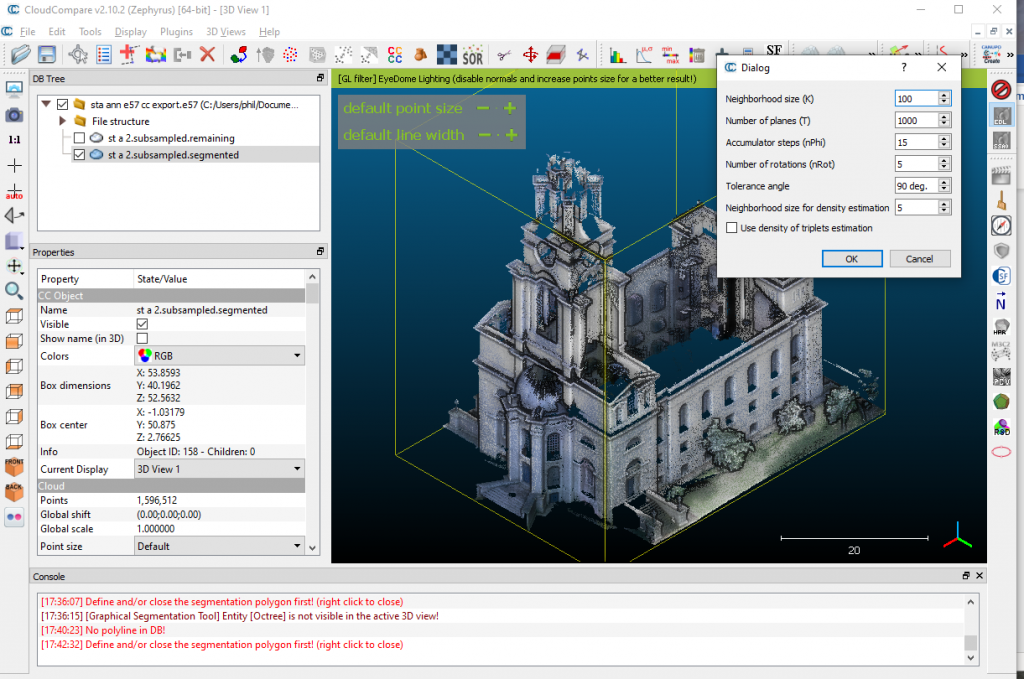
If the operation results in all the outside appearing black and the inside as coloured then it is “back to front”. In this case invert the normals by selecting EDIT – NORMALS – INVERT
To start the actual conversion select
Plugins – Poisson [Poisson Surface Reconstruction]
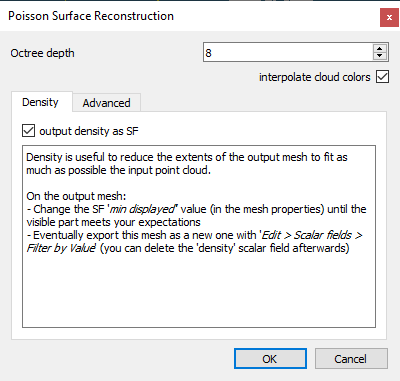
- Ensure “Output Density as SF” is clicked.
- Octree Depth has 8 as the default. A higher number may generate better results but will take longer to process
- The defaults on the advanced tab will likely be fine
- Press OK to start process
The resulting conversion is likely to appear as your original model covered by a “filler” like shape. We need to shrink this filler away until just the shape of your model is clear (or as clear as is possible)
Untick the original model and leave ticked just the newly created Mesh object in the DB Tree.
In the property window lower down look for the SF Display Params section
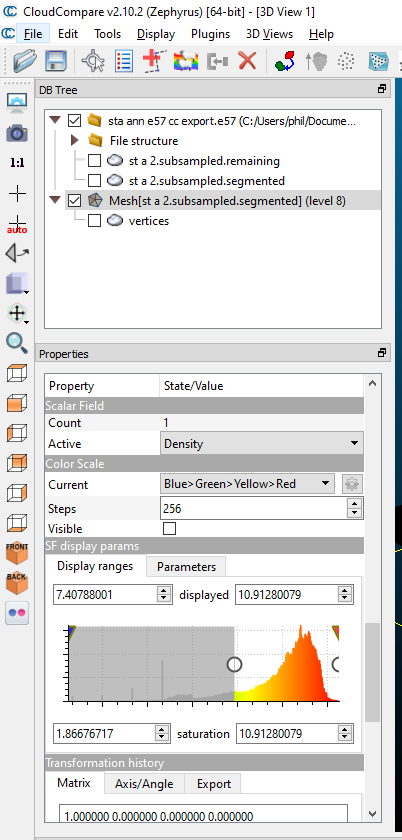
There is a graph for Display Ranges which has two small circles that can be dragged – click and drag the left hand circle towards the right to the point where you can best see the proper shape of the model. If you go too far it will shrink away the model itself too.
When you are have achieved the most accurate shape / model then spawn this as a new child object:
Edit – Scalar Fields – Filter by Value / Export
There is now a new child object of only the selected range – click this object to select it and choose File – Save to export it as an OBJ or FBX file that can be brought into Rhino, Blender, 3DS etc.


