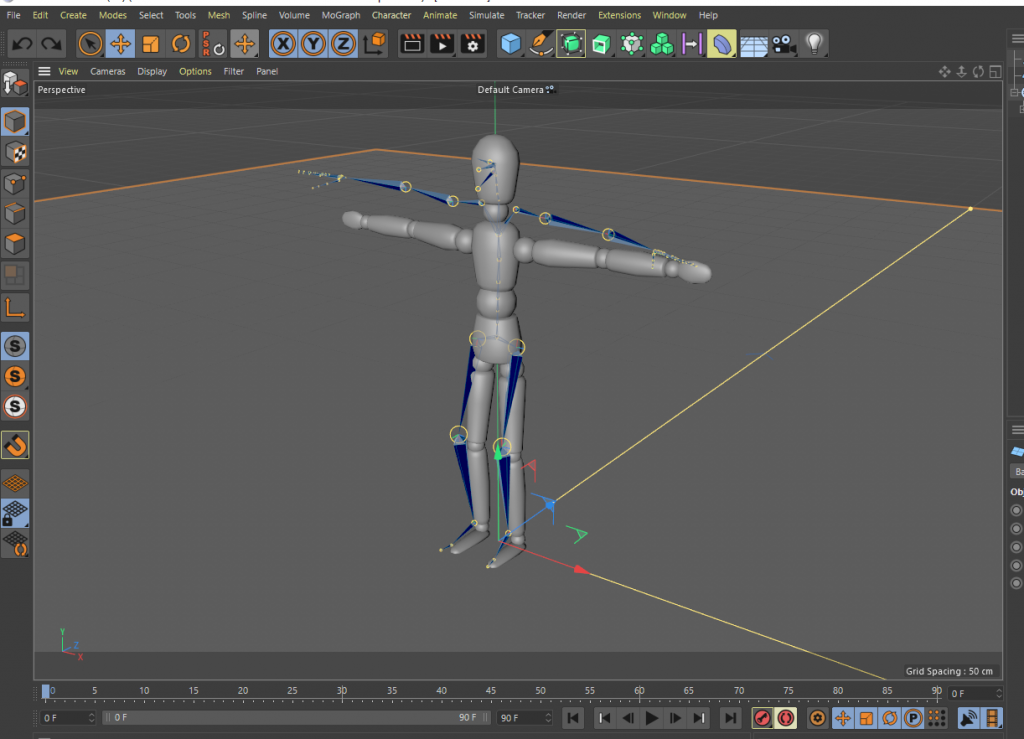
The Cinema4D motion capture will show as a moving body object in the viewports – but this is just an illustrative tool for hanging a body onto and will not render on its own. To be able to render out this animation you would need to attach – or bind – an object to it.
Cinema 4D has a standard biped figure primitave that can be used to do this. You could edit this body to suit your needs; for example scaling the head or stretching the arms. Standard biped model – rigs – are also available online – or you could design your own (though this is quite an involved process as it needs relationships between limbs and joints defining if it is to work properly).
To bind a C4D body object to your capture create a new figure:
Create > Primitive > Figure
And a figure will be created at roughly the location and size of the capture in the first frame

It is unlikely that the capture and the figure will match up so before binding them together the figure needs to be edited:
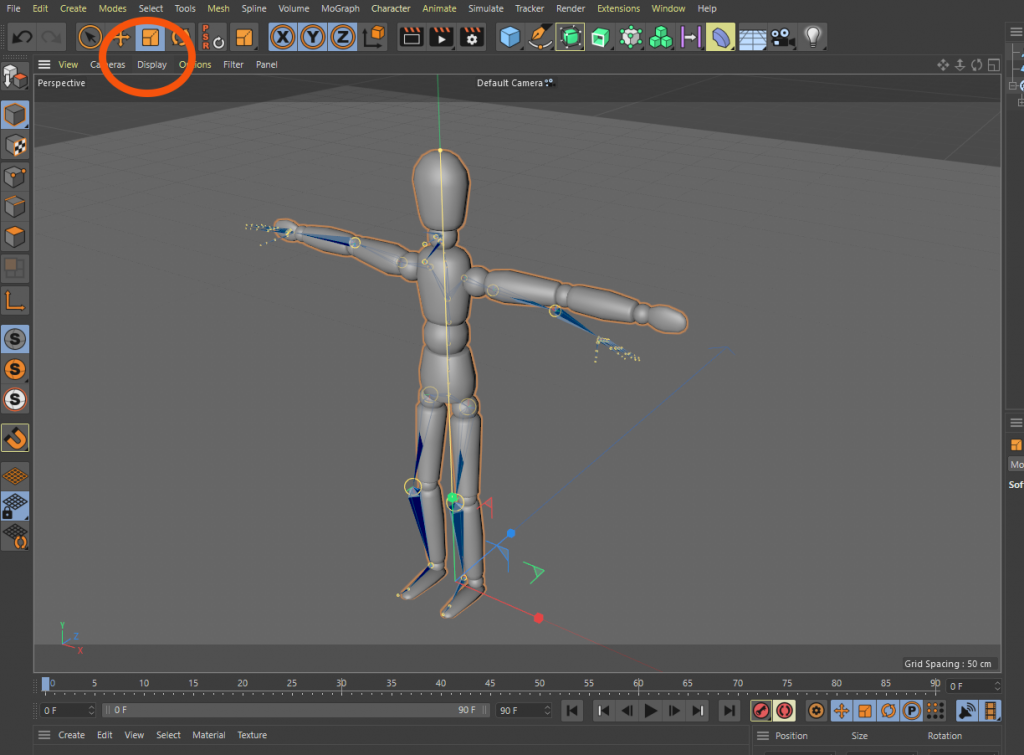
First scale the body so it is roughly the same size – the shoulder points are a good target; in this example we would select the figure and use the scale tool to drag and make the whole figure large enough so the shoulders are located properly (Scale tool circled red, click and drag the green square in the figure)

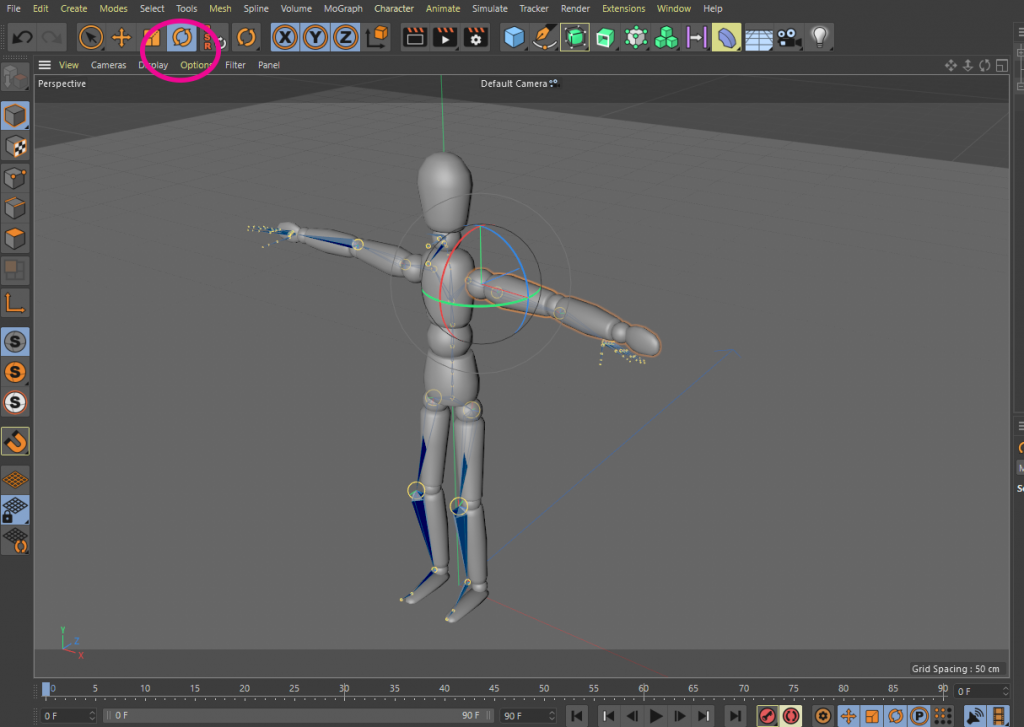
Next the limbs need to be adjusted to better match the capture – select the figure and press “C” to make it editable. Then pick the limbs one by one to rotate them so they are better lined up
Here the left upper arm has been clicked, then using the rotate tool the whole of the arm is brought forward. Clicking on the forearm next would allow the end of the arm and hand to be rotated at the elbow

Keep selecting and rotating limbs until the figure covers blue capture body; knees, elbows, feet – and also toro to make the entire upper body lean if necessary. It does not have to be spot on perfect and not all of the captured points – for instance, fingers – have a corresponding part in the figure.
The next steps will bind the figure to the capture. In the Object window on the right:
– Right hand click on Figure and choose Select Children
– Right hand on Figure and choose Connect Objects and Delete
– Right hand on capture and choose Select Children
– Control click on Figure (so both are highlighted)
– From the main control panel choose Character – Bind
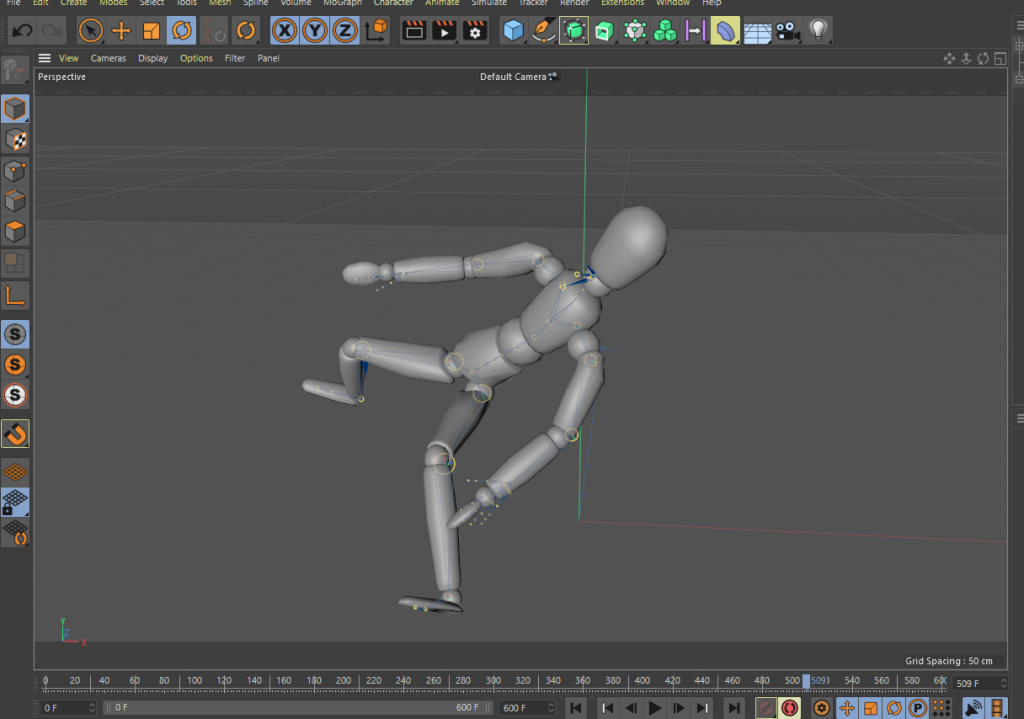
The body will now be wrapped around the motion capture so if you drag the timeline head or press play the body will mimic your capture

This can now be rendered out as a movie or sequence of stills. Specify the file output type and location from
Render > Render Settings
To choose where to save the file to, what frames to render and what size, format, etc. it should be. PNG file with alpha channel would generate files with transparent background making it easy to drop onto After Effects compositions, etc.
Cinema 4D has a render queueing facility that allows you to stack up render jobs; but you can also just start this render off with a
Render – Render to Picture Viewer


