


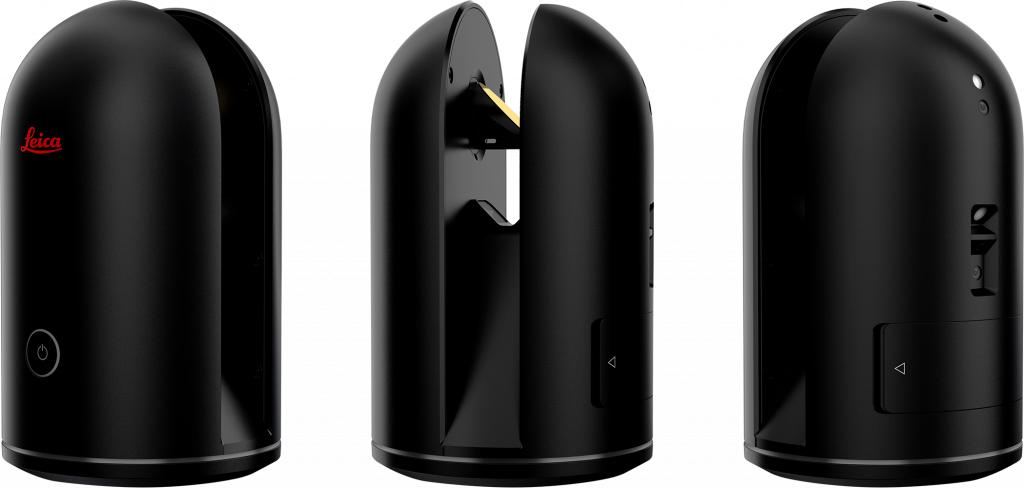
The BLK360 is a small, light and quick laser scanner with a maximum range of 60m. It can be operated via a mobile app and then fully processed on a PC with the corresponding desktop software.
Leica provide their own software – Cyclone – but it will also work with the easier to use Autodesk Recap Pro for mobile and desktop, which is free to students.
Software availability / usability:
- Recap Pro is installed on all the Stockwell Street Building 11 PCs
- This software is also available free from Autodesk via their education site. or as a trial version. Registration required.
Ipad: Recap Pro Mobile
Recap Prop for Mobile is available free from the App Store
Use a regular wifi connection on your iPad to start the Recap Pro app and login to your Autodesk account. To then connect to the scanner itself switch the scanner on and connect to its own wifi network – the details of which can be found inside the battery cover.
Once connected to the scanner you will be able to browse, edit and delete existing projects or create new ones – it is very useful to name a folder / project before going out on a scan visit (or deleting everything) to make it easy to ensure you are pulling the correct scans into the desktop application later.
Operating the iPad mobile app is then just a question of locating a suitable spot to carry out a scan and selecting New Scan to start it.
- Scan locations should be chosen so they go around and cover as much of the subject as possible (cut down the blind spots)
- Have overlap between scans so they can be successfully registered (ideally with distinctive points like corners of walls, letterboxes, distinct windows, etc).
- Safely located – not an obstruction, not likely to fall over, not in rain, not at risk of being stolen
- It is a good idea to have a map of your scan area and mark on there scan locations and names.
The scanner App will try and register scans as it goes so try keep plenty of overlap between successive scans. If it does not auto-register you will still be able to do this afterward on the desktop PC.
Workstation: Autodesk Recap
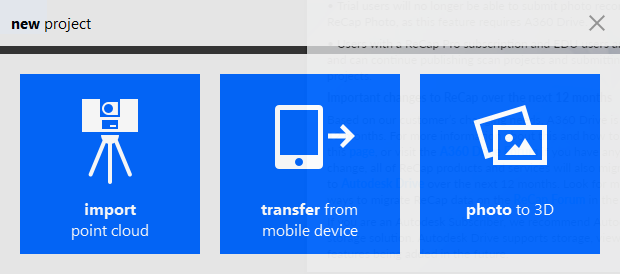
Launch Recap, create a new project and choose the option to Transfer from Mobile Device. The iPad needs to be plugged into the PC and Recap Pro Mobile open and running (can require some cable unplugging / plugging to nudge this part)
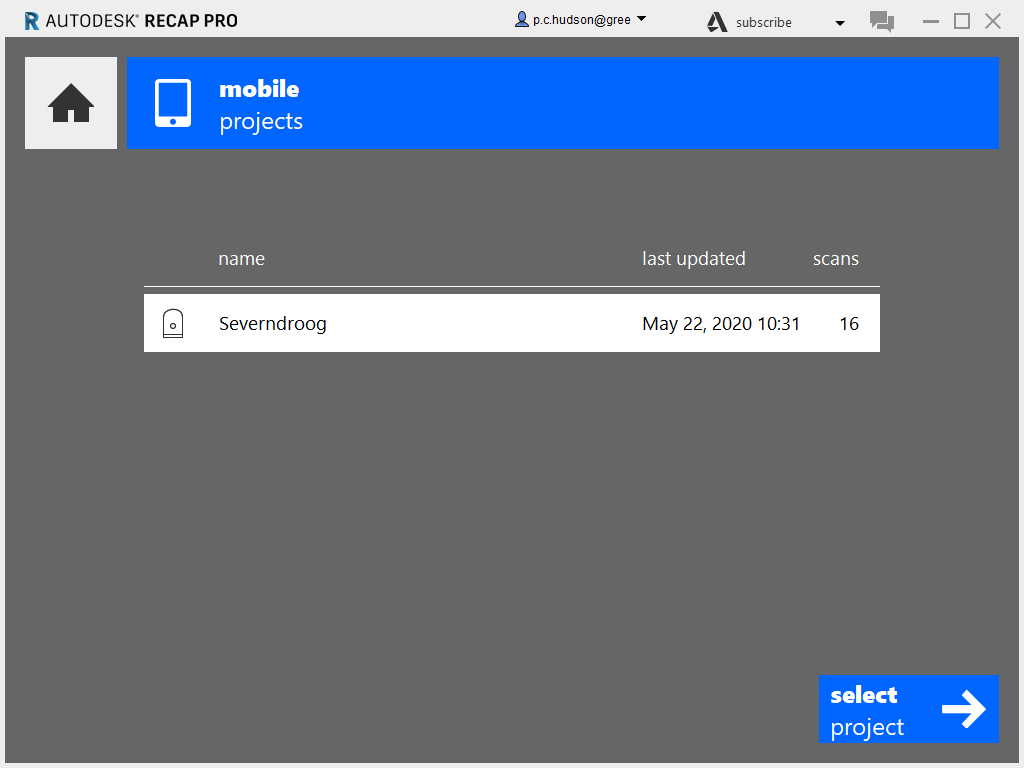
Next you will see the project folder of your scan session on the iPad. Select this, and choose a name and location for the project to be created on the PC. Note these scan projects can get very large – make sure your destination drive has plenty of free space.
All of the scans will now be imported to the PC; this can take a while.
At the next screen all of the scans will be listed for registration – lining up and stitching together.
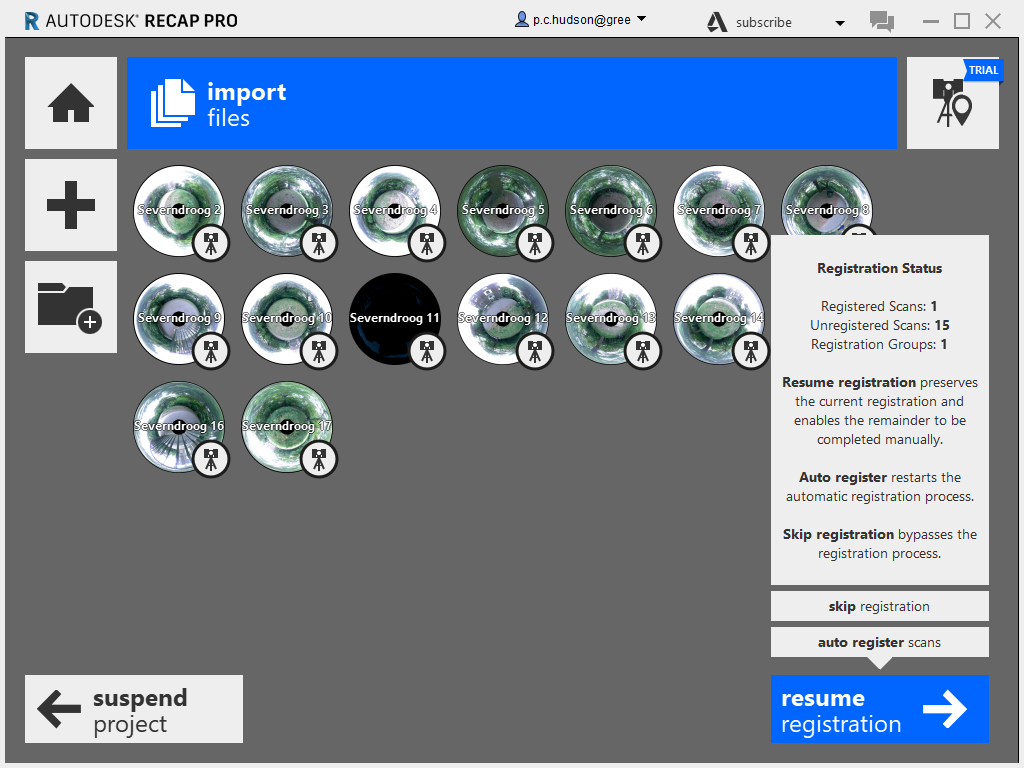
Resume Registration will pickup and refine any registration already done on the iPad – and add the other non-registered scans. This will be the quickest way as it will just refine the existing scan links.
Auto Register will do the whole registration process again which can take some time. The software will try to identify common points in all of the scans to be able to blend them together. Successful auto registration depends on good scans with overlaps and distinctive points.
Ideally scan will auto-register correctly but it is more likely that there will be a few that need manual confirmation and registration
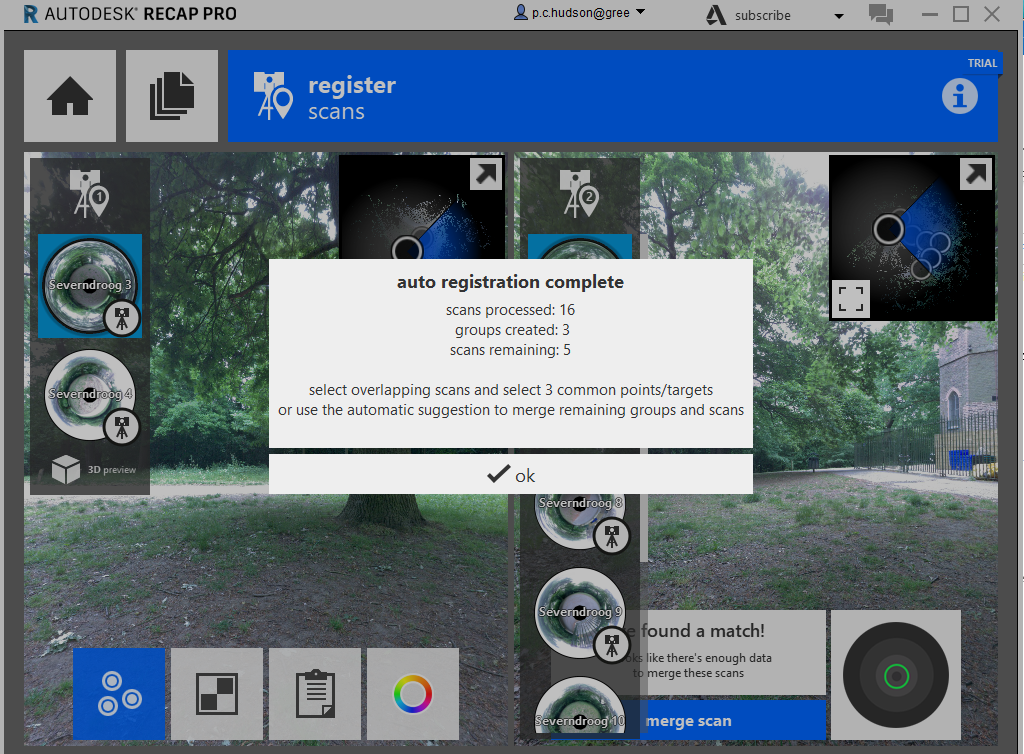
Recap will show suggestions of scans and allows you to confirm to merge them if they look correct
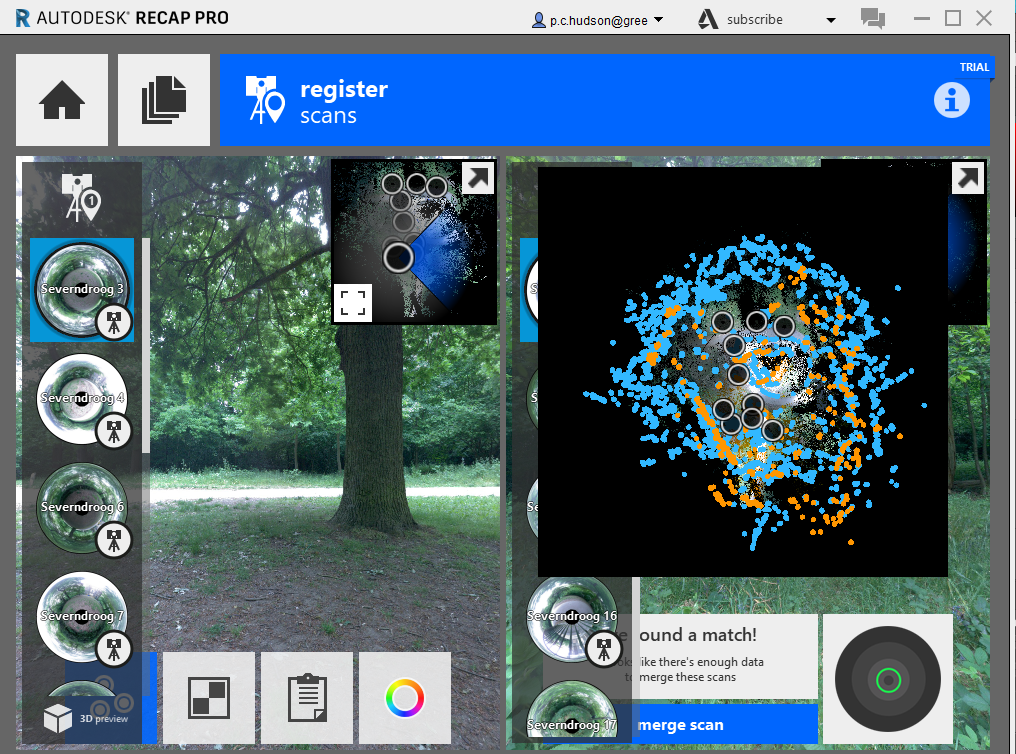
For scans that it cannot find a match for you will be given the option to manually register by picking three common points in each of the views – pan and zoom around look for distinct, still points like corners of windows, fence-posts, benches, etc. When Recap detects these as matches you will have the option to merge and proceed.
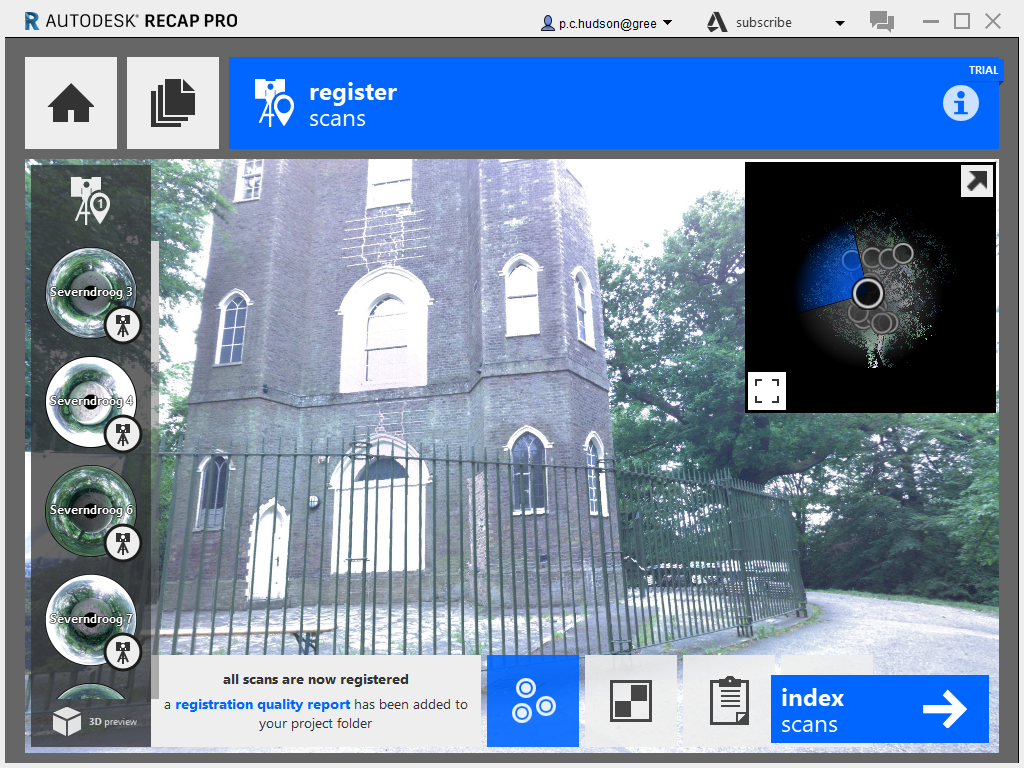
Repeat this process so all the scans are properly registered – if there are scans that just cannot be tied to any of the others then you can remove them altogether.
Click Index Scans (takes a while), and then Launch Project
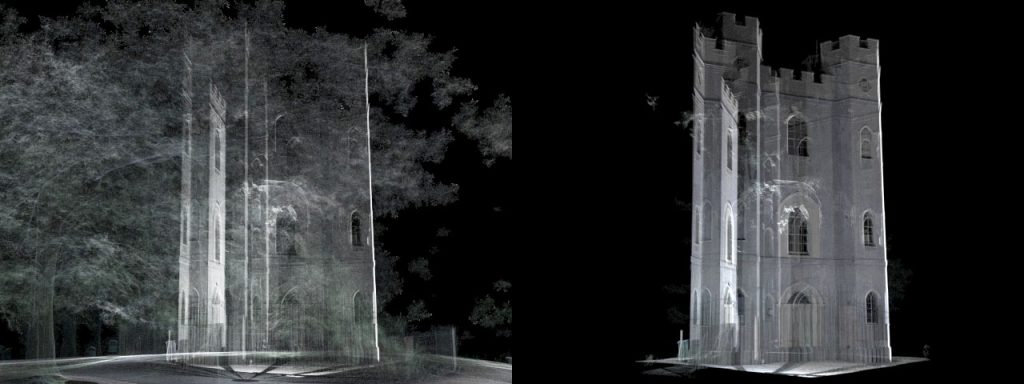
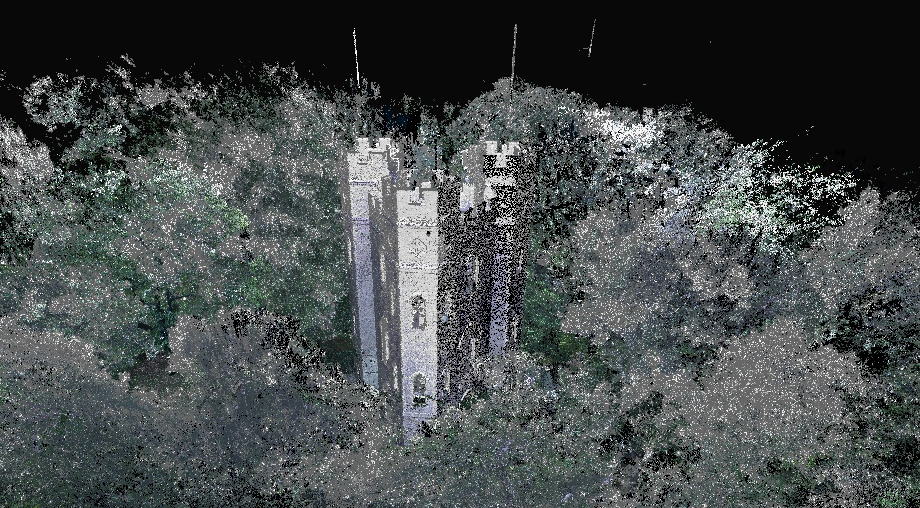
After this has completed you will see your full registered scan and be able to use Recap’s tools for cropping the file, deleting regions, changing the view style and exporting the point cloud. The Recap point cloud viewer does optimise view quite a lot to make it quicker to navigate – once exported to other software, for example 3D Studio, the images will be much richer and finer.
You can export the point cloud for use in other applications by choosing Export off the home button, or save this view as an image with Export Image

Note: Recap has no optimise or mesh functions built in
File Export options:
- RCS – works best for integration with Autodesk products, e.g. Autocad and 3D Studio Max.
– 3DS Max can render point clouds using Vray or Arnold - E57 – Rhino can read E57
– Rhino cannot render point clouds - PTS – Common point cloud format which can be read by MeshLab if you want to try using that for a mesh convert