


Availability / usability:
- Recap Pro is installed on all the Stockwell Street Building 11 PCs
- This software is also available free from Autodesk via their education site. Registration required
- Quite straightforward to use and quick for viewing point cloud data
Operation guide:
Start Recap Pro and create a new project for import point cloud. Name the project and specify where it is to be saved – the location of your project is important, ideally you should point this at an external drive that has plenty of free space as scan projects can get very large.
First you need to locate the scans, e.g. from the SD card and drag them all onto the target. You can drag in the whole folder of scans and Recap will pick them out.
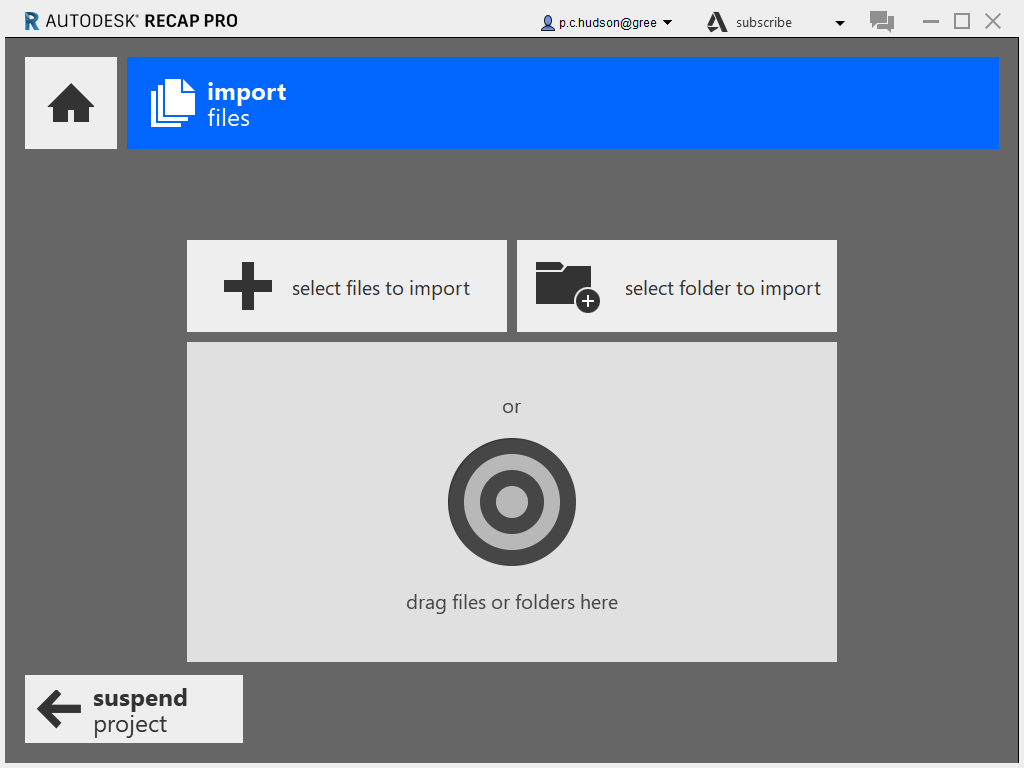
If the scan files are properly recognised then you will see an import window with some presets. You can experiment with these settings but the default settings ought to be fin (the Aggressive filter scan option is good for reducing the scan to just strong, clear measured points but will throw a lot away)

Hit Import Files to continue, and then Auto register at the next window. Now Recap will try and recognise and align all of your scans – this can be a lengthy progress depending on the number of scans.
Hopefully, and ideally, all the scans will have recognised each other and be showing correctly into one big scan (this is where doing well placed scans with common overlaps is so important).
If the some of the scans are not aligned then you will be prompted to do some manual alignment. This requires you to pick common points in each of the side by side scans – rotate and zoom in the scans to locate clear points like corners of walls, ends of pipes, or other sharp clear and non-moving features in both scans.
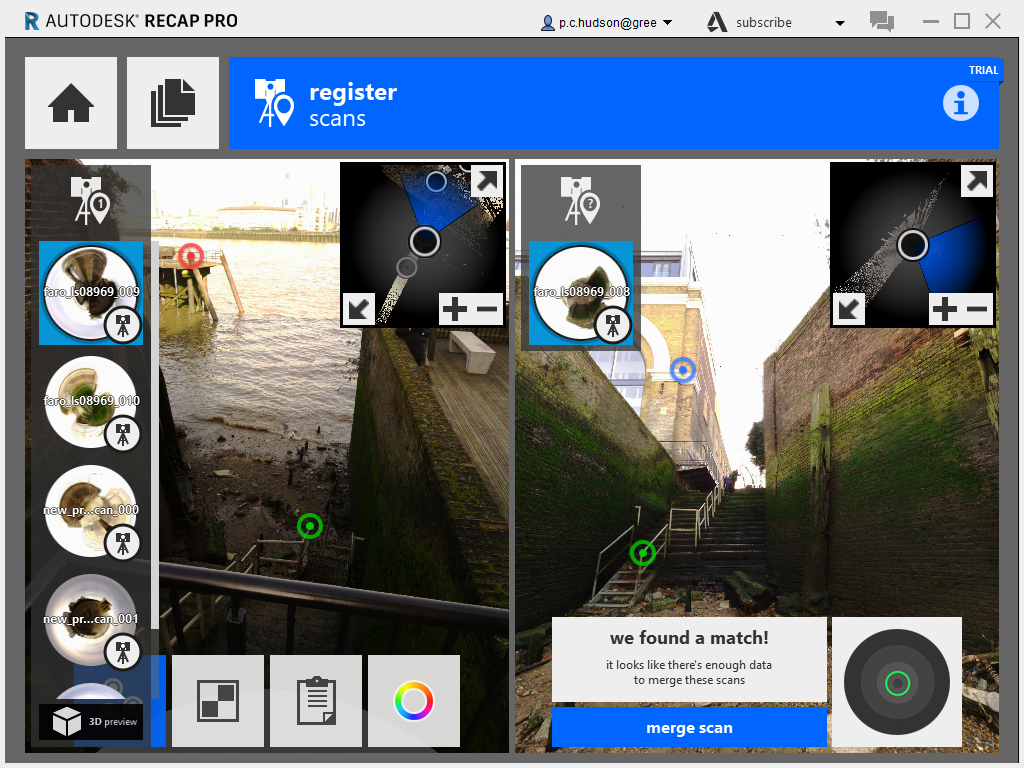
Keep picking points until Recap says a match is found – at which point click Merge Scan, then Index Scan. Once again you will need to wait a while for the merge operation to finish.
Eventually you will see the scan / point cloud version of your site
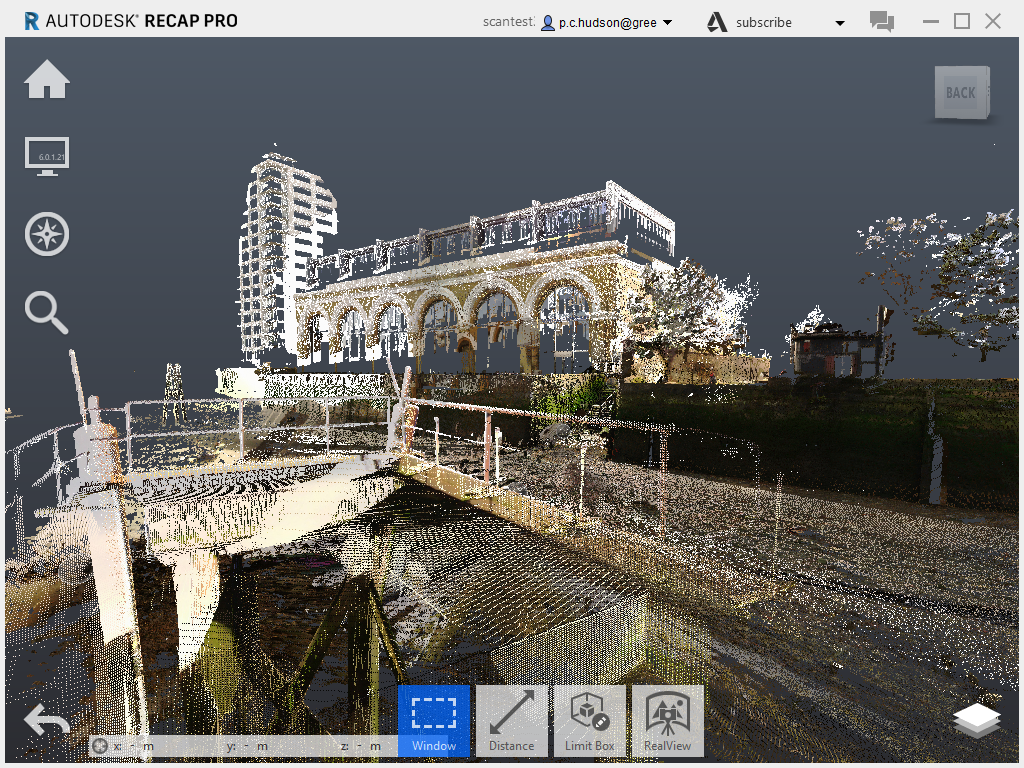
You can spin and zoom using the mouse, and also use the view settings to alter colours and adjust the size of the points. Areas and point cloud dots can be directly selected and deleted if they are not needed, and the clipping tool is useful to box down the view just to the area of the site you are interested in – drag sides of the box to resize and ctrl-click on a corner to rotate it.
You can export the point cloud for use in other applications by choosing Export off the home button, or save the view as an image with Export Image
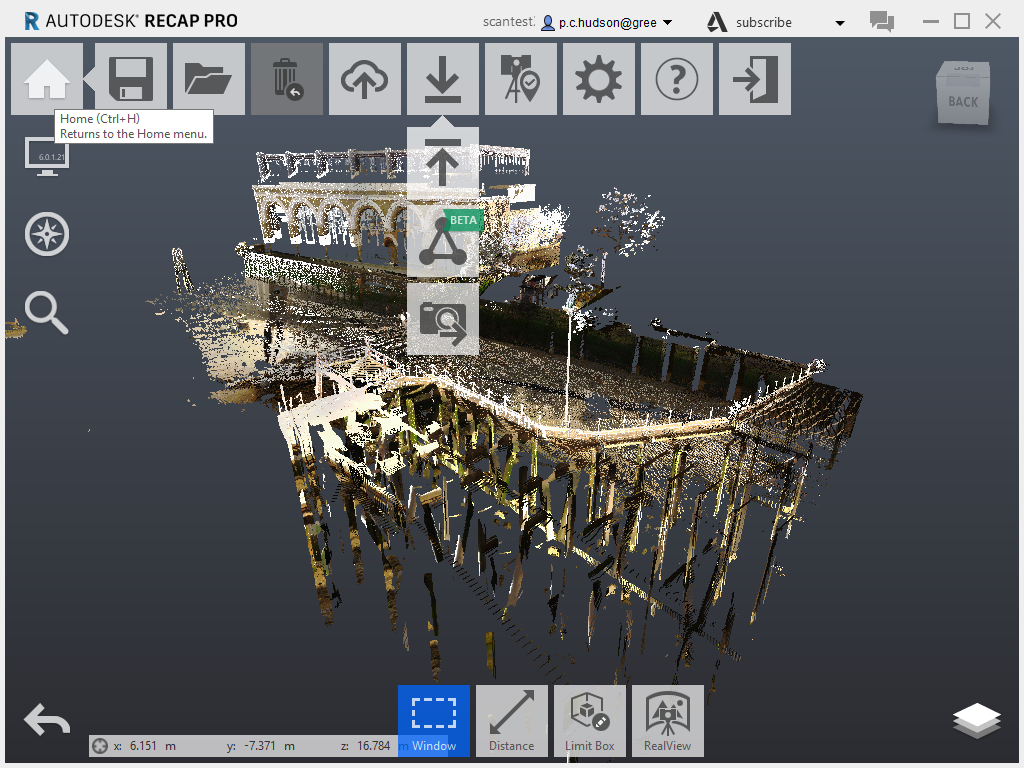
Note: Recap has no optimise or mesh functions built in
File Export options:
- RCP – works best for integration with Autodesk products, e.g. Autocad and 3D Studio Max.
– 3DS Max can render point clouds using Vray - E57 – Rhino can read E57
– Rhino cannot render point clouds - PTS – Common point cloud format which can be read by MeshLab if you want to try using that for a mesh convert