


Moves by Maxon is an iOS app that can capture either facial expressions or body movements to import into Cinema4D for use with character rigging and animating. It requires the latest iPad Pro or iPhone for the capture part of the process, and Cinema 4Dr21 or higher for importing and editing.
Although this capture technique can sometimes struggle with things like limbs when they are out of site – e.g. an arm behind the torso – the results are impressive and hugely more straighforward then traditional mo-cap methods requiring special body suits and multiple camera setups.
Once in Cinema4d the motion capture is represented as a skeleton-like figure with joints representing elbow, knees, etc. This can be used to bind a body model – or rig – to it and so have that model walk and move with the actions of the captured subject.
Body Capture via iPad
Once the free Moves by Maxon is installed on a suitable i-device click on the camera icon to go to capture mode, then the body icon to switch from face capture to body capture.
When you point the camera at the model you should see a “skeleton” superimposed onto the subject and moving with it. Then it is simply a case of pressing record / stop / save to capture each take. The app does not let you play back your captures – you need to import them into C4D to see them, so do a few takes to make sure you have good source footage.
To get the best results:
- Use a neutral background, if possible, where the subject can be distinct and stand out well. Wear clothes that have a suitable colour and fit.
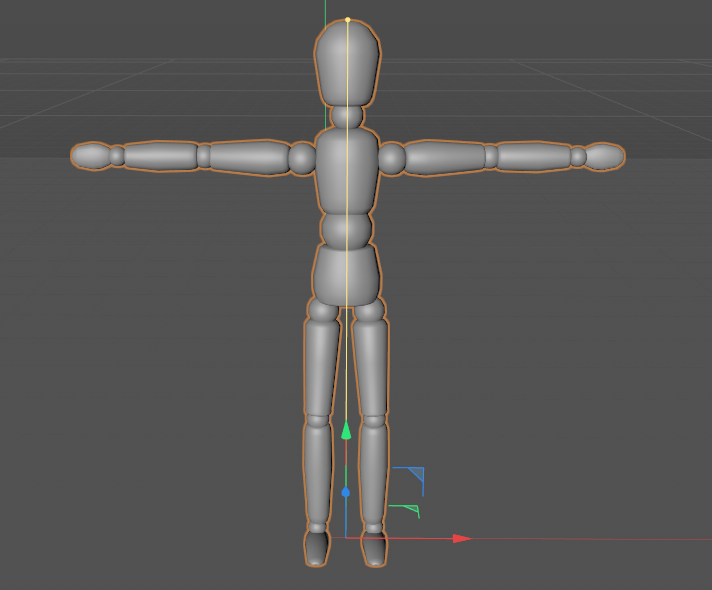
- Start the recording with the subect in an arms-out pose – this helps when binding the import to the rig model (most downloadable rigs will be in this position, as is the default C4D body). You can trim that pose out of any final renders
- Be careful of obscuring limbs behind objects or other limbs – this capture is using a single viewpoint so anything out of sight is guessed at
Import to Cinema4D
Cinema4d is available as a free trial from Maxon.net or there is a student version available for a small processing fee. Version r23 will shortly be available on the Design Studio machines
To use the app once installed you will still need a free Maxon account which you can create on their site.
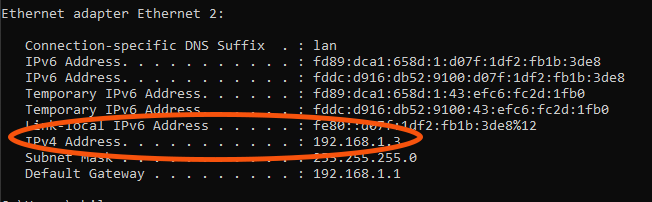
Captures are transferred to C4D over the network but C4D needs to know your network address (your IP address). You can find this on a PC by hitting the start menu and typing CMD followed by enter. Look for the numbers next to IPv4 Address; in this case 192.168.1.3
Note: due to the way the University wifi is setup this method will NOT work – this method will only work for your home machines / wifi networks.
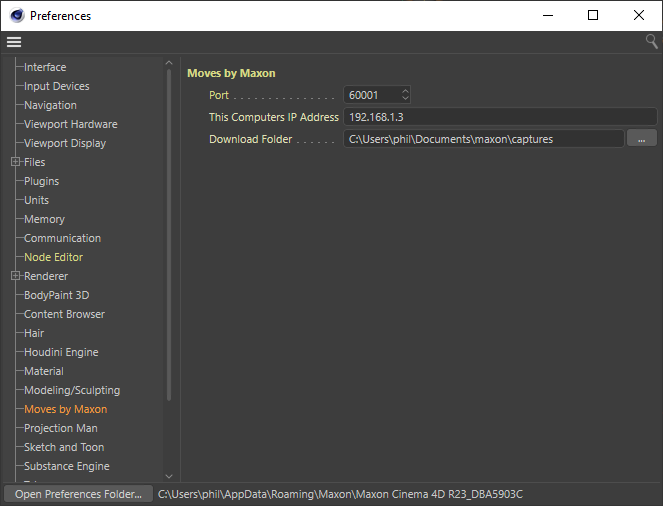
Once you have this number you must enter it into the C4D preferences – at Edit – Preferences – Moves by Maxon.
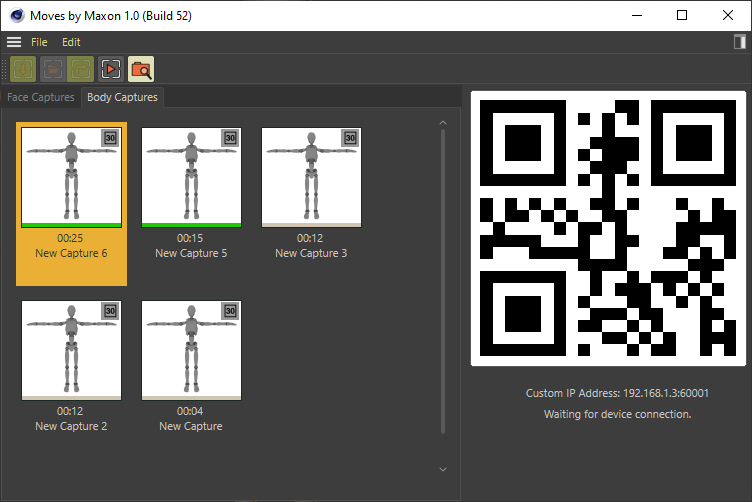
Next, in C4D choose Extensions – Moves by Maxon and it will show a QR code.
Back in the iPad app choose the C4D icon and point the camera at this code – if the network connections are ok then you will see your captures stacked up under the Body Captures tab
Double click on the capture to download it to your machine then right click on it to open this as a new file – or merge into an existing one.
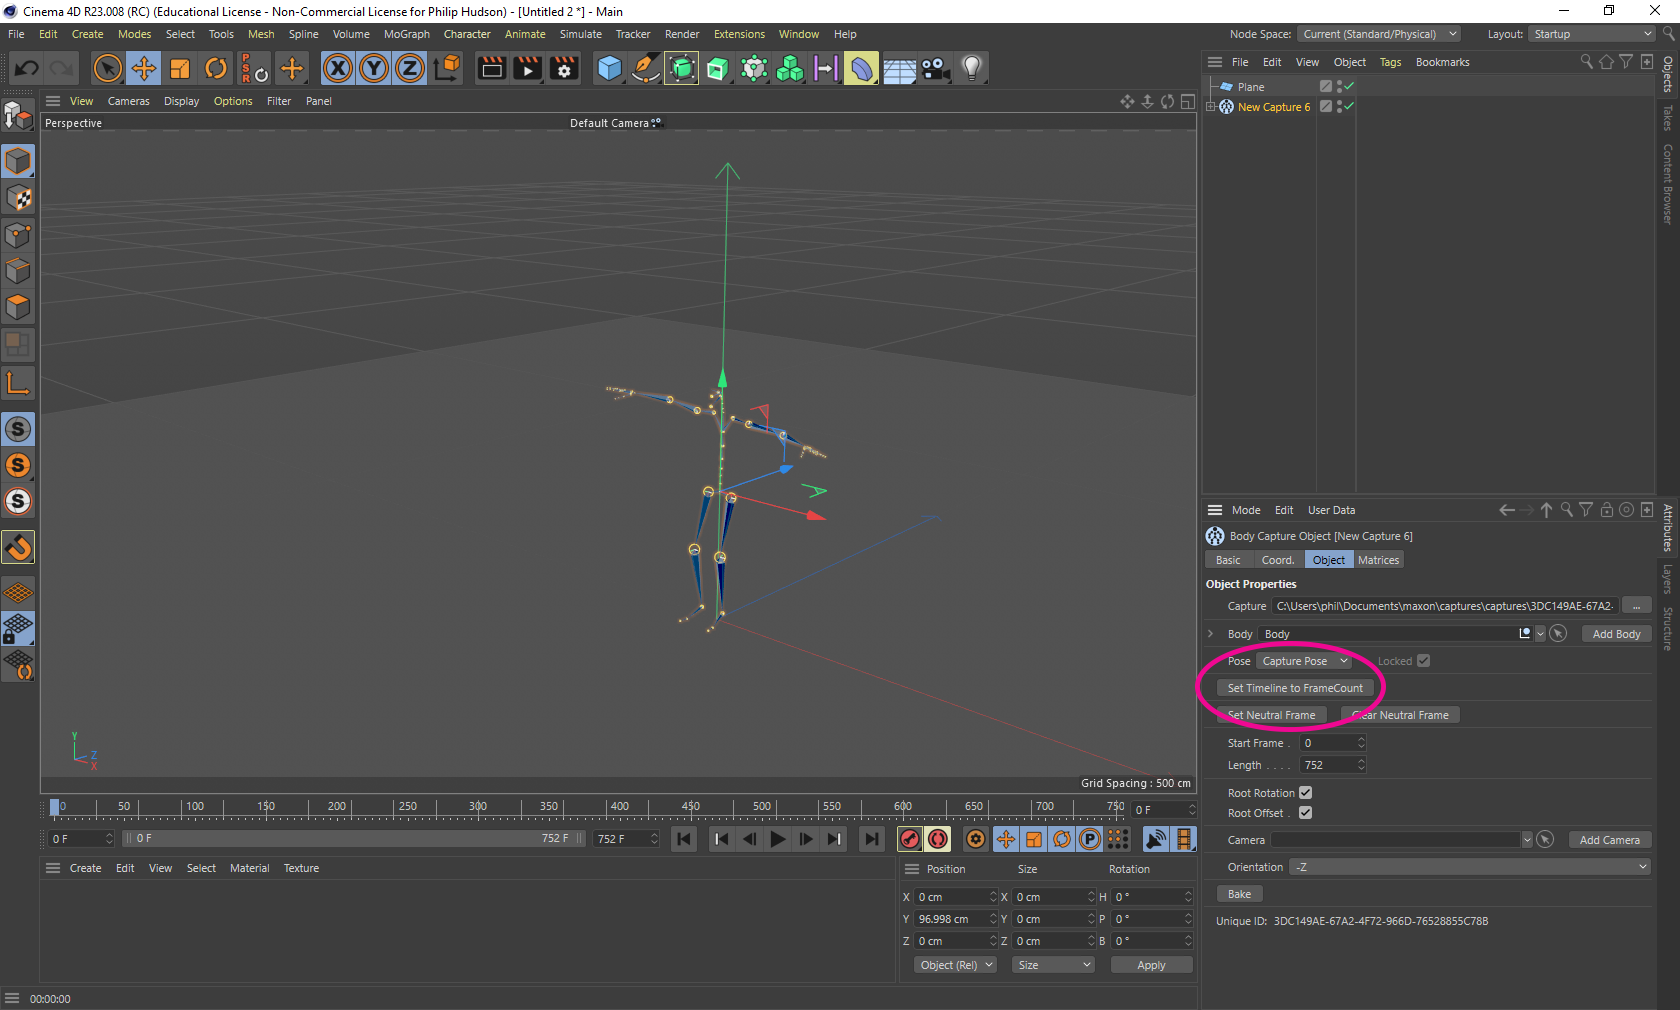
Press the play button to preview your capture moving – you may need to click Set Timeline to Framecount in the right hand panel to have the entire capture fit into the timeline.
You can now “bind” any biped character to this skeleton – to wrap it onto the capture. This could be a character rig that you have downloaded, the standard C4D figure – or a geometry you have created yourself from scratch; this could even be from a photogrammetry model.