


This scanner is a handheld SLAM scanner, SLAM stands for Simultaneous Localisation and Mapping which means it scans as it moves instead of scanning from a series of fixed points around a space like the other laser scanners. This makes scanning easier and quicker and there is often no need for post-processing / registering separate scans together – though it is still possible to do multiple walk-arounds with the BLK2GO and then link them together afterwards.
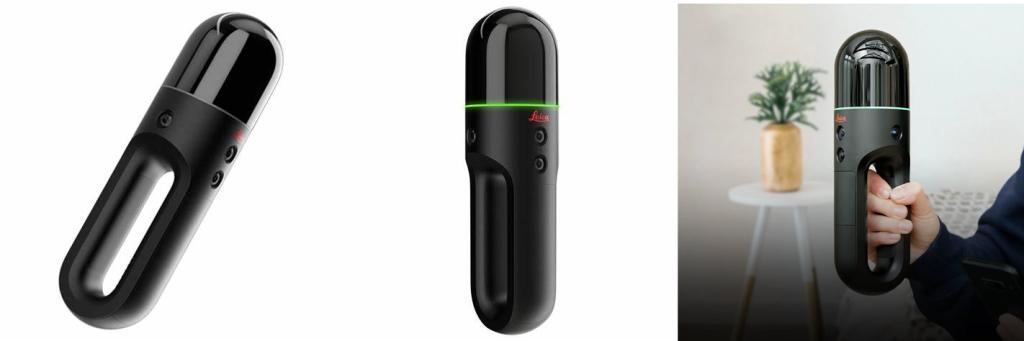
The range is about 25-30 metres so not as far as the other scanners. It is operated via a freely downloadable iOS or Android App – BLK2GO Live – which links to the scanner and allows the user to see the scan form from the walkthrough of the space in real time; you will need to install this app on your smartphone to use the scanner.
Once the scans are complete, they need to be uploaded and processed – by us – and exported as an RCP or E57 point cloud file which can be taken into 3DS, Recap, CloudCompare, TwinMotion, etc.
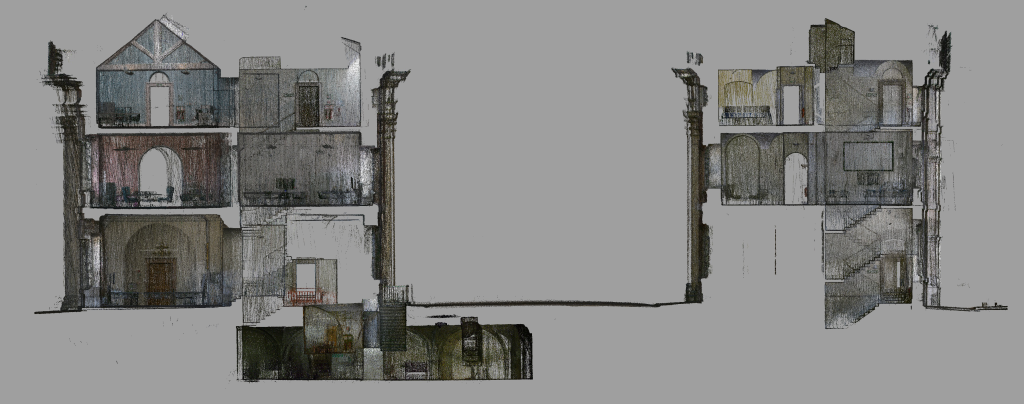
This scanner is most suitable for large buildings and spaces – while it will capture smaller objects in the scan they would not be of sufficient detail or clarity. Also the resulting scans will be point clouds – not meshes. For small models, bodies, faces etc. photogrammetry or iPhone lidar would be a better option.
Full specifications and details about the BLK2GO can be found at the Leica website
Access to the Scanner
The scanner is available by pre-arranged, day-loan only to particular student groups involved in 3D capture work. A technical introduction is required before taking the scanner and you must complete a loan form agreeing to use the scanner in a safe, acceptable, and legal way:
- Site visits outside Uni must be accompanied; minimum of two people
- Loan is for the day only – not overnight; equipment must be returned before end of the working day (5.00PM).
- Scanner must not be left unattended, either boxed or setup (unless secured, e.g. in a locked boot of a car)
- The scanner must not be used outside in wet or misty conditions – check the weather before visiting site.
- When carrying out scans use the wrist strap
- Do not scan in dangerous locations or take the scanner where it could cause an obstruction
- Permission may be required – similar to film shoots – for sensitive locations or buildings; do not trespass onto private property.
Download the loan request form here, for signing and submitting to hp04@gre.ac.uk
Operating the Scanner – Site Visit
To operate the scanner you will first need an Android / Apple smartphone. Install this free app on your device in order connect to it.
Once you have the app installed and have the scanner ready to carry out a scan then:
- Take the battery out and take a photo of or note down the wifi codes on the info sticker behind the battery – this shows the wifi name and password which you will need to connect.
- Put the battery back in and power on the scanner by pressing and holding the power button – when it is green it is ready to connect
- On your smartphone app connect to the wifi scanner’s network – BLK360xxxx with the password from the sticker.
- When the scanner is connected to your smartphone it will just list any scans on the device – when you are ready to start a new scan press the green button, and put / hold the scanner in a firm, known start location. It needs to be held still while it registers its location – and will not proceed if it was not a successful initialisation.
- Once the scanner is ready you can move through the space and capture what it can see – the app will start to give an optimised approximation of the capture – this is not the full detail level; you will only see the full unfiltered level of point cloud once the scan has been brought onto a desktop PC.
- While carrying out the scan it is possible to take panoramic images to add to the scan survey by pressing the button for a second.
- When you have finished scanning press and hold the button for 5 seconds – the app will go back to the list of scan jobs
- If you want to do more scans than repeat the scan operation for the next set of scans.
Here is a very useful video tutorial by Leica on how to operate the scanner
Useful Guidelines for Scanning
To operate the scanner safely and to get the best quality scans keep in mind these tips
- Plot a course through the space that captures all areas – it is easy to miss a room or area, and not so easy to return to site a capture it again
- Move at a steady pace – the faster you move the less data will be gathered
- Use the wrist-strap to protect against dropping, use the phone holder attachment to clip your phone to the unit
- When going through doors go through sideways and give the scanner some time on the threshold to tie the two rooms together
- Hold the scanner – not at arms length – in front of you. It will ignore a bubble about a meter around it (so it excludes the operator from the scans)
- A battery will last around 20 minutes, but single scans should not be as long as this or the scan accuracy will “drift”. Aim to do larger areas in chunks of no more than 15 minutes – multiple scans can be combined in the post-processing software.
- Always transport the scanner in its protective case.
Post Processing – Bringing the Scan Data to your Software
You can retrieve the raw scan data in a number of ways – the easiest way is if you have your own laptop:
- Power up the scanner
- Connect your laptop to the scanner via its own wifi network – join the network BLK2GOxxxx with the password on the panel
- In a browser on your PC visit http://10.0.0.1 and login – again with the credentials from the sticker
- Select the option to download data – select the scans you carried out and download these to your machine (they may be quite large files)
- These will be .B2G files, you will need to bring them on a stick to Phil Hudson, or WeTransfer them to p.c.hudson@gre.ac.uk
- It can take a few hours to convert these to a format that can be read by regular software. Our suggestion is that the file is returned to you as .RCP – this type of file can be opened and edited in Autodesk ReCap (this software is on all our PCs plus it is available as a free download for students).
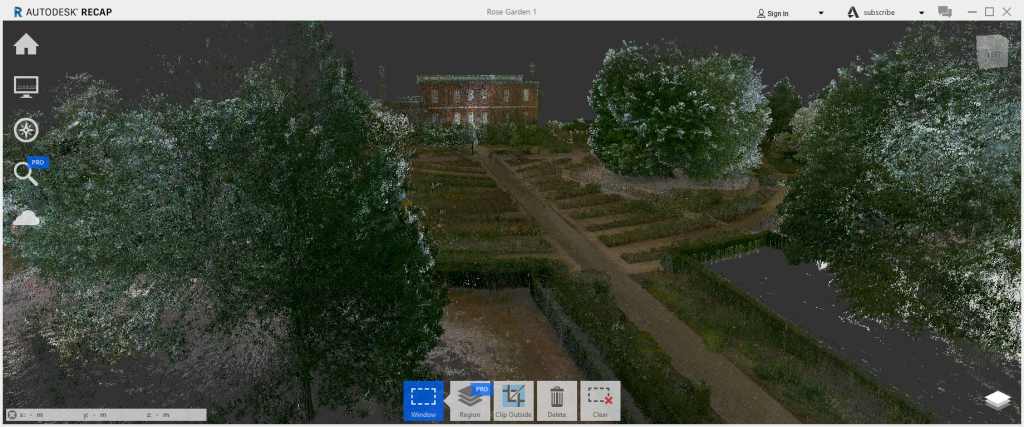
ReCap will let you crop the point cloud to the area you need and also cleanup / delete unnecessary parts of the cloud (for example areas captured through glazing should be removed as the refraction of the laser through glass means it won’t be truly accurate).
ReCap is good for quickly viewing and editing the file – and you can export basic renders from it – but for more in depth use you will likely want to take it into another application. The Autodesk software – Autocad / 3ds / Maya – will read RCP files so export from ReCap as that. For other software such as TwinMotion, CloudCompare, Houdini and others the file format E57 is more portable – Recap will allow you to export as that too. There is more information about Recap here (though you will only need the parts about registration if you made multiple scans of the site).