Start by running the following file:
C:\Windows\SysWOW64\odbcad32.exe
You will then need to create a user DSN:
Within the ‘ODBC Data Source Administrator’ window, ensure that the ‘User DSN’ is selected, then click the ‘Add’ button

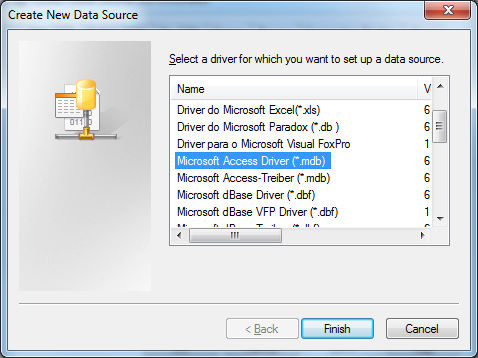
A new window will appear titled ‘Create New Data Source’. Ensure that the ‘Microsoft Access Driver (*.mdb)’ option is selected, then click the ‘Finish’ button
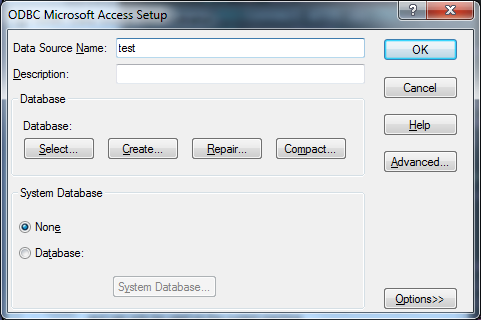
Afterwards, a window titled ‘ODBC Microsoft Access Setup’ will appear. In the ‘Data Source Name:’ field, give your data source a name then click the ‘Select’ button
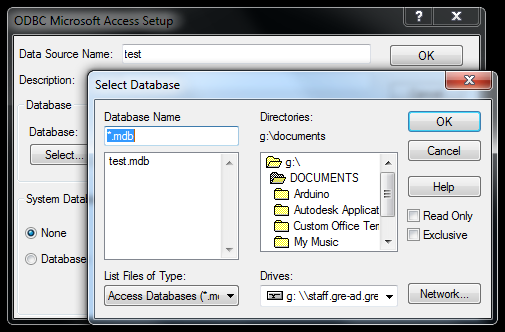
After that, a window titled ‘Select Database’ will appear. Locate your Microsoft Access database, then click the ‘OK’ button
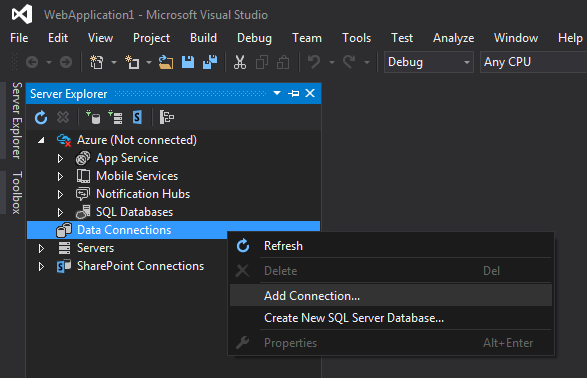
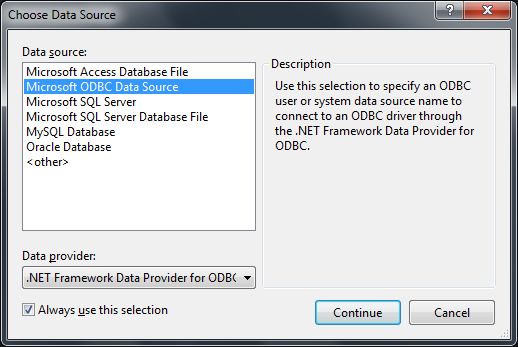
Return to Visual Studio and set up a data connection using your ODBC data source.
Within the ‘Server Explorer’ pane (left hand side of screen), right-click ‘Data Connections’, then click ‘Add Connection…’
A new window will appear titled ‘Choose Data Source’. Ensure that the ‘Microsoft ODBC Data Source’ option is selected, then click the ‘Continue’ button
Afterwards, a window will appear titled ‘Add Connection’. Within the ‘Data source specification’ section, ensure that the ‘Use user or system data source name:’ option is selected, choose your data source name from the drop down list (if you don’t see it within the drop down list, click the ‘Refresh’ button), then click the ‘OK’ button
