Please note the instructions below assume you already have a database setup on the SQL Server. Please see the SQL Server support pages for instructions on getting a SQL server database created for your use, and how to use SQL Server Management Studio to access it and create tables etc.
To connect to your SQL Server database in Visual Studio start a new project and bring up Server Explorer either by clicking on the tab next to the Toolbox or by going to View > Server Explorer. Right click on ‘Data Connections’ then click ‘Add Connection’.

On the next screen (Choose Data Source) change the data source ensure ‘Microsoft SQL Server’ is selected then click the ‘Continue’ button.

- In the ‘Server name’ field enter ‘SQL-SERVER’.
- Change the ‘Authentication’ method to ‘SQL Server Authentication’.
- Enter your username and SQL Server password in the relevant fields.
- Enter your username in the ‘Select or enter a database name’ field.
- Tick the ‘Save my password’ box.

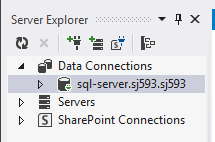
Click the ‘OK’ button to exit the ‘Add Connection’ wizard and you will have added a connection to the database that will appear under ‘Data Connections’ in ‘Server Explorer’.
You can then setup an SQL Data Source using this connection, and use it to populate data controls such as a grid view, etc. as shown below:
