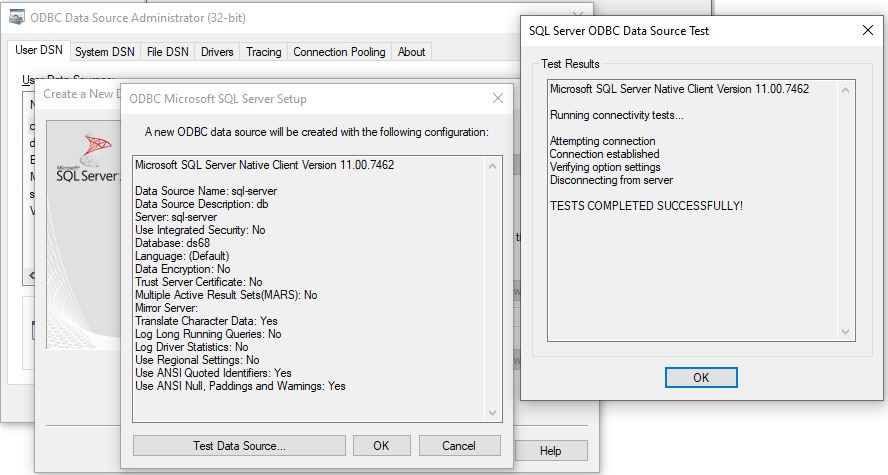
This tutorial shows you how to create a user DSN. These are used to connect programs/databases to other databases.
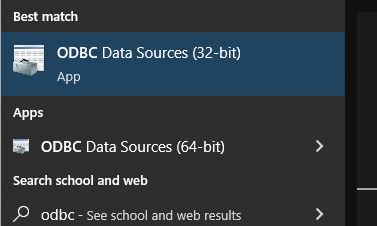
1. Open the ‘ODBC Data Sources’ menu
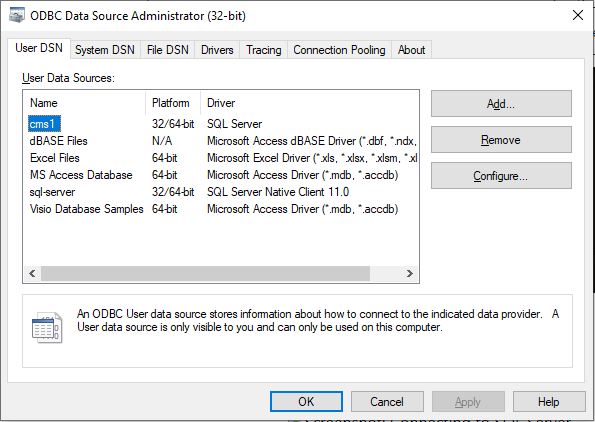
2. Make sure the ‘User DSN’ tab is selected, then click the ‘Add’ button
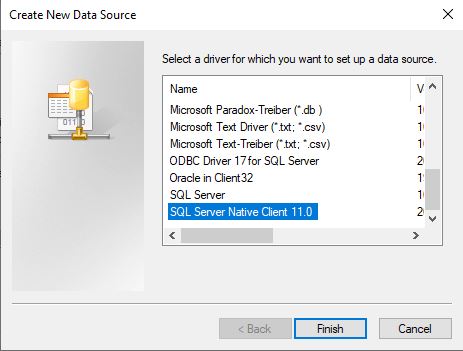
3. Select ‘SQL Server Native Client 10.0’ then click the ‘Finish’ button
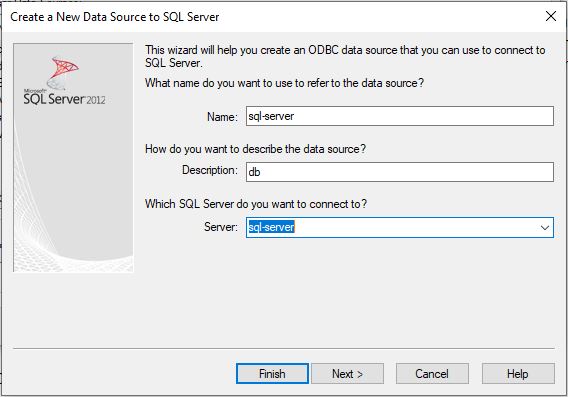
4. Give the connection a name (this is what you will use in your db link) along with an appropriate description, use the drop down list to choose the server you wish to connect to. Click the ‘Next >’ button to continue.
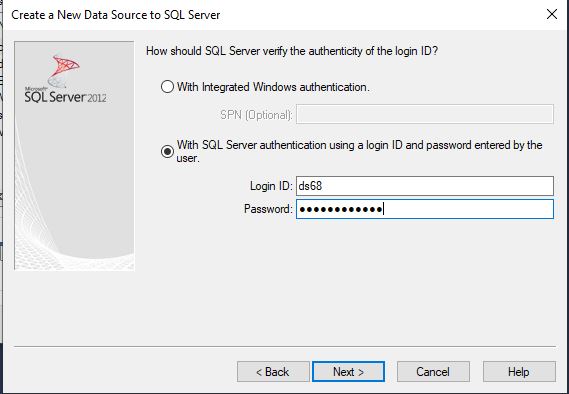
5. Check SQL Server Authentication. Ensure the radio button for ‘With SQL Server authentication using a login ID and password entered by the user.’ is selected, then enter your Username (e.g. ab123) and password as set. Ensure that the checkbox for ‘Connect to SQL Server to obtain default settings for the additional configuration options.’ is ticked, then click the ‘Next >’ button.
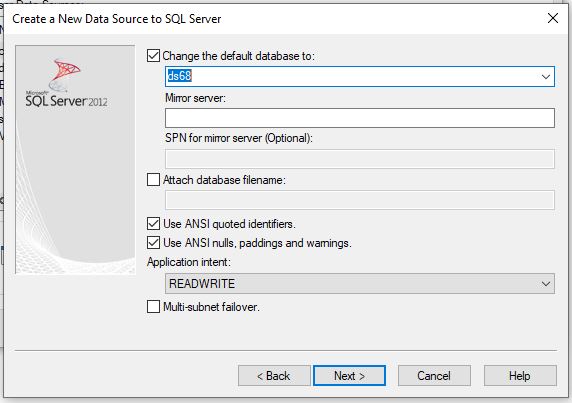
6. Change the default database to your own
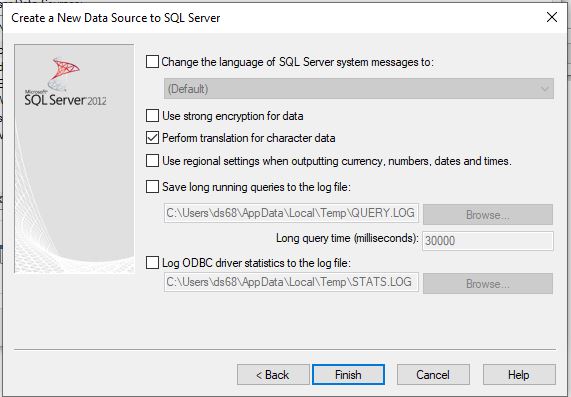
7. Accept the default options by clickling the ‘Finish’ button
8. Click the ‘Test Data Source…’ button to test your connection
