PyCharm, one of the many IDEs available, should already be pre-installed in most of the labs located in King William and should also be available on the student virtual desktop.
No Python Interpreter Issue
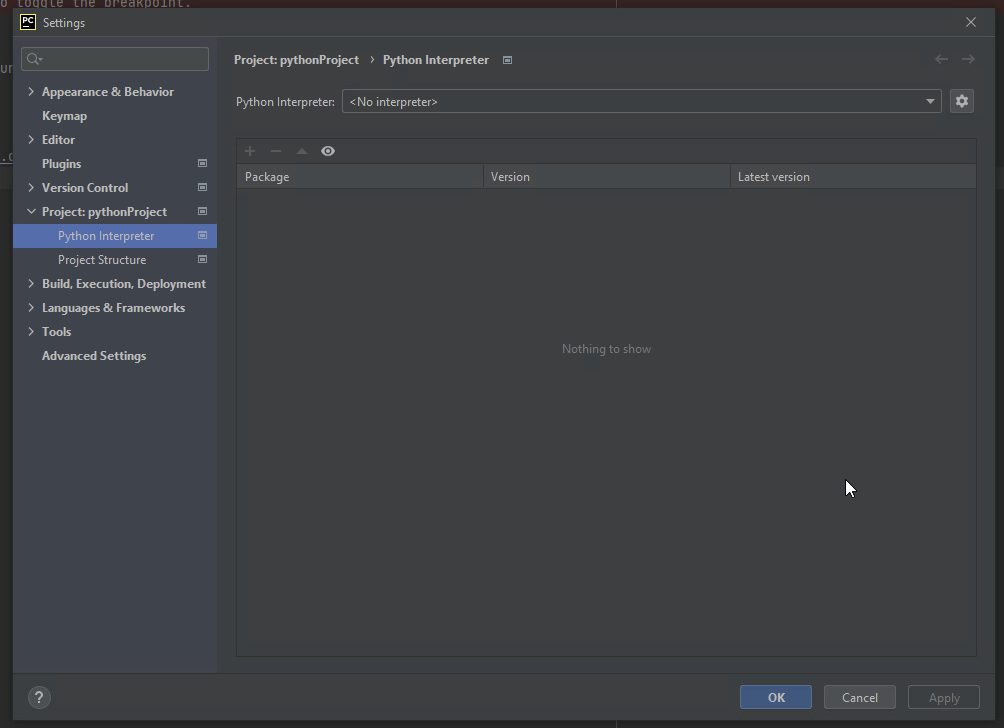
Some of you may have experienced an issue when creating or importing an existing project where the PyCharm says that there are “No Python Interpreters” configured and that no code can be executed.
This is due to either a few reasons:
- Python is not installed.
- PyCharm might be attempting to install Python but (if you’re on University computers) you don’t have the permissions to directly install it from the website via default methods.
- The path to the python interpreter was not given when creating or opening an existing project.
- PyCharm was configured incorrectly.
There are many different ways to fix this and can change from person to person if it’s being used on a personal device.
Configuring PyCharm
Creating a new PyCharm project
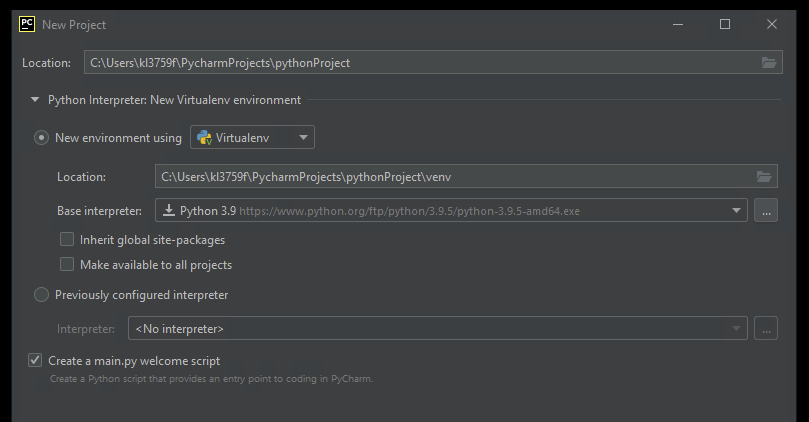
When opening PyCharm and creating a “new project”, you should be greeted with a small window asking where you want to save the project and the interpreter you wish to use.

Figure 1 shows the default settings for the interpreter and as you can see it’s set to use ‘Virtualenv‘ (which is fine if you’re on your own personal computer) but this is not usable for most of the university’s computers and university virtual desktop. The base interpreter is currently set to Python’s install page and will require admin permissions to install, which you do not have on our computers.
Solutions
Make sure Anaconda is installed (which should be installed for most of our labs in King William). If it isn’t, you can find it in Software Centre.
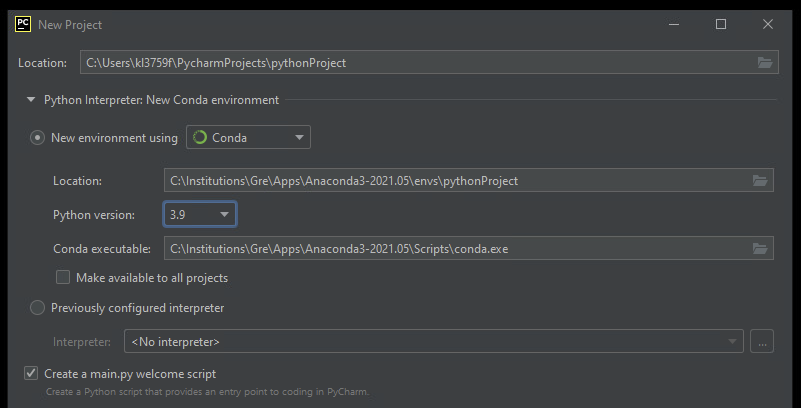
Afterwards, in the configs, change ‘Virtualenv’ to ‘Conda’ and select the Python version that you need.

Make sure that the Conda executable is set to the location where conda.exe is found (which should be almost identical to Figure 2)
Once you’ve done that, create your project and you should be good to go!
Importing/Configuring an existing Pycharm project
Open your python project and go to:
File > Settings > Python Interpreter (it can be searched or located under your project name tab)

Click on the cog symbol and go to ‘Add’.

You’ll be prompted with a new window. Select Conda Environment and proceed to do the same checks and changes mentioned in the previous section.

For your own personal computers, you shouldn’t have this problem as you should have the right to install it via the default configs (Virtualenv). If you wish, you can also use the Anaconda method.
If you’re unsure of anything or require additional help with this, try looking at this documentation or seek help at the King William IT Counter at KW116. We’ll be happy to help!


