Note that you need to be using a computer on the University network, or be connected to the virtual desktop in order to access the SQL Server
Connecting to your database
- Open up SQL Server Management Studio
- For ‘Server type’ ensure ‘Database Engine’ is selected.
- For ‘Server name’ select ‘sql-server’.
- For ‘Authentication’ select ‘SQL Server Authentication’
- Enter your username and SQL Server password in the ‘Login’ and ‘Password’ boxes. Your SQL Server password will be issued to you at a support desk, or from your lecturer.
- Ensure the “Trust server certificate” tickbox is ticked
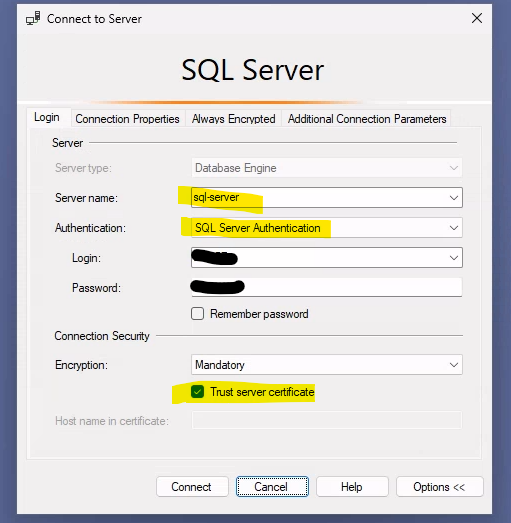
Then press the “Connect” button to connect. If prompted to change your password then do this.
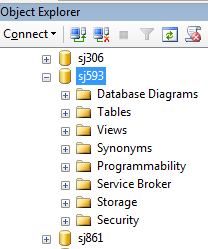
2. Once you have connected to the server expand the ‘Databases’ node to see a list of all the databases on that instance.
3. Scroll down until you find your database (your user ID). Expand this node and you will see a list of folders as shown in the image below.
Creating a table
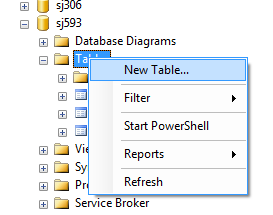
1. To create a table expand the tables node, right-click ‘Tables’ and click ‘New Table’:
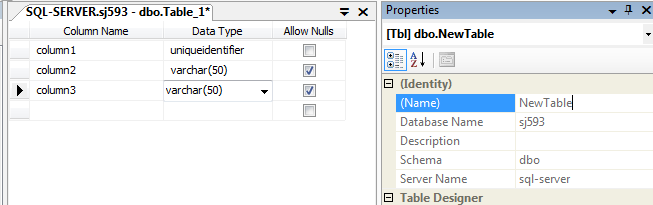
2. Enter the column names and data types you want in your table then under ‘Properties’ in the ‘Identity’ section, for the ‘(Name)’ value enter a name for your table, save the changes you have made to create the table, then close it.
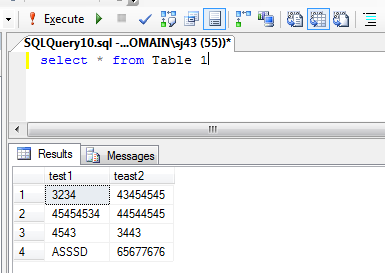
Running queries
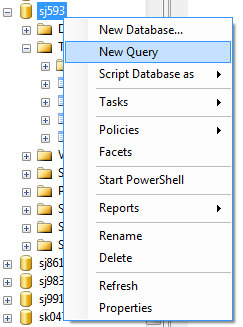
1. To run queries against your database, right-click on your database (your username then click ‘New Query’.
2. This will bring up a window for writing SQL statements, write your SQL in the window then click the ‘Execute’ button. This will run the code and the results will be shown in the ‘Results’ window below.