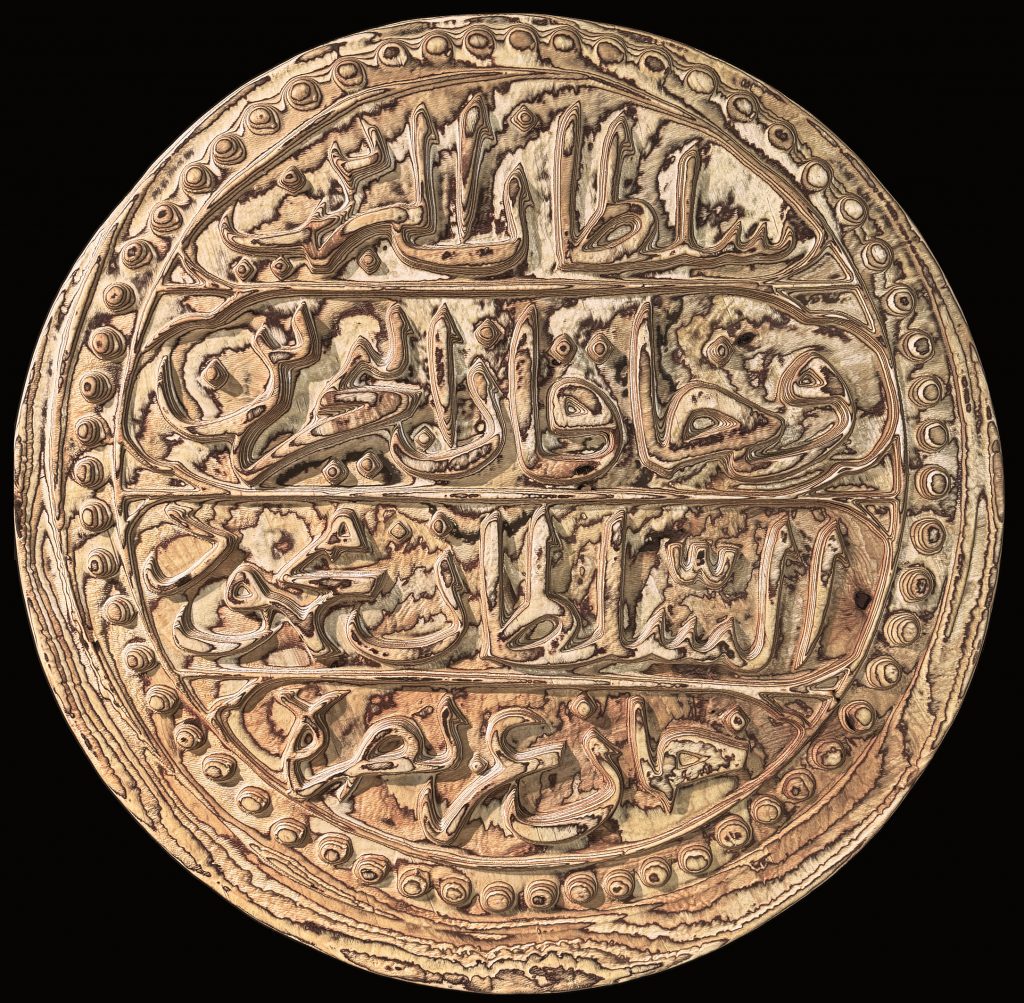
A project to capture and reproduce an 18th-century coin from the collection of Michael Talbot, Associate Professor in the History of the Ottoman Empire and Modern Middle East at the University of Greenwich.
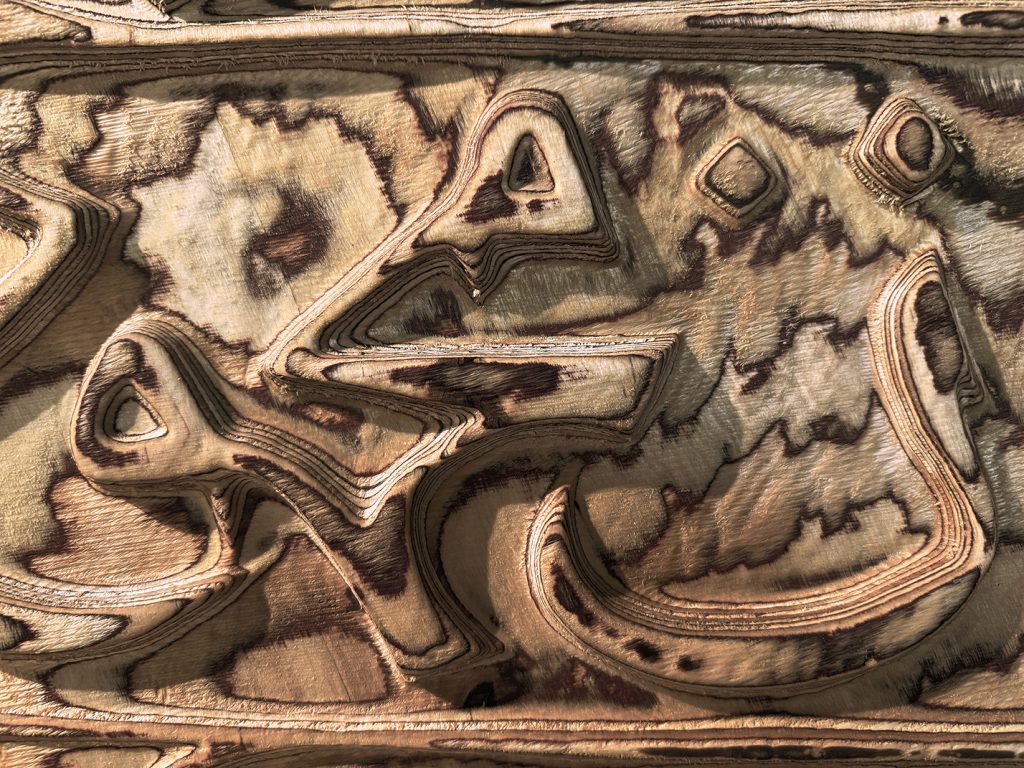
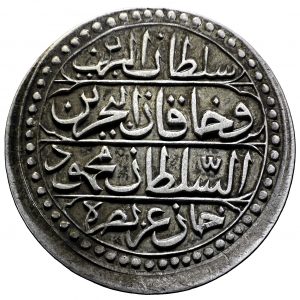
The original silver coin, just 28.7 mm in diameter, was transformed into a one-meter-wide replica carved from birch plywood.
- Denomination: 1 Budju
- Material: Silver
- Width: 28.7mm
- Weight: 10.37g
- Mint: Algiers
- Year: 1239 (1824)
- Language: Arabic

The Arabic inscription reads:
“Sultan of the two lands and ruler of the two seas, the sultan Mahmud Khan, may his victory be glorious.”
Replicating the coin comprised of the following steps:
Capture the Image:
Take a high-resolution, evenly lit, perpendicular photograph of the coin.
The original coin would have been struck by hand, here it has resulted in a slightly misaligned strike that left excess material, or ‘flashing,’ on the lower edges.
Generate a Depth Map:
Convert the photograph into a grayscale depth map – an image where varying shades of black and white represent the coin’s relief (depth and height).
There are a number of techniques for estimating a depth map from a 2d image; traditional, rule-based / algorithmic techniques – and more recently AI neural networks trained on a huge datasets have proved very effective.
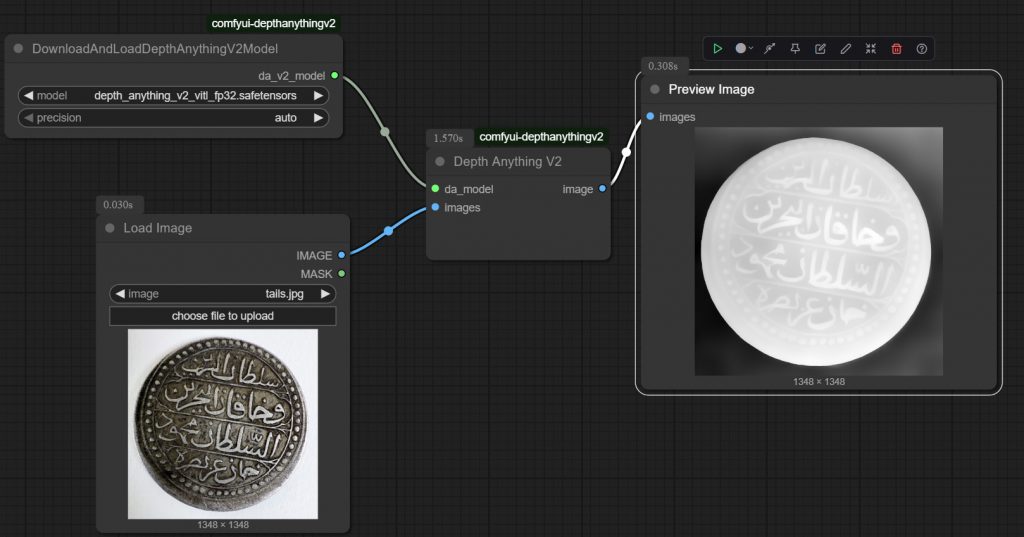
Some examples of these (open source) models are Marigold, Midas, DepthFM. There are online versions of these that can be used – but in this instance DepthAnything was used to process the image locally.
Create a 3D Model
Apply the depth map as a displacement map onto a flat digital model to create a 3D surface.
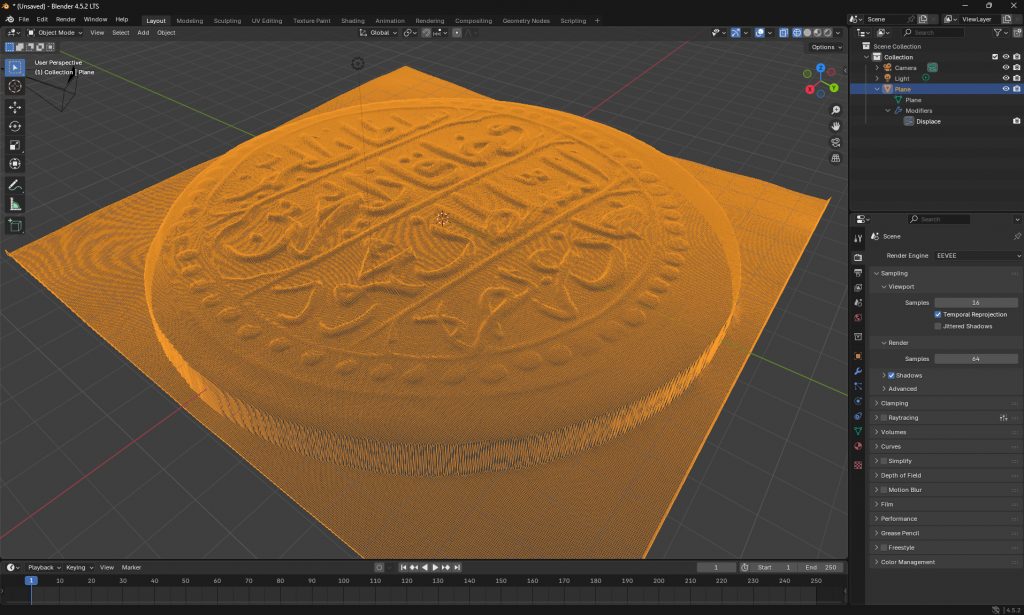
With the depthmap image as a PNG image, this can be applied as a displacement modifier in most 3D editing software then exported as an OBJ.
• Rhino – HEIGHTFIELD command, select the depthmap file. Increase the sample points to get a finer mesh
• 3d Studio – Select the geometry (cylinder) and apply DISPLACE modifier, load the depthmap image – use the strength parameter to control height of displacement.
• Blender – Add new mesh plane, subdivide the mesh in object mode many times, apply the displace modifier, create in that a new texture and open the depthmap image to apply it.
CNC Toolpath Generation
Import the .OBJ into CAM software to generate the toolpath – these are the digital instructions the CNC machine will follow to take the drill bit around the material fixed on the CNC bed.
CNC Machining:
Run the CNC operation to carve the 3D coin shape from a block of plywood according to the toolpath.
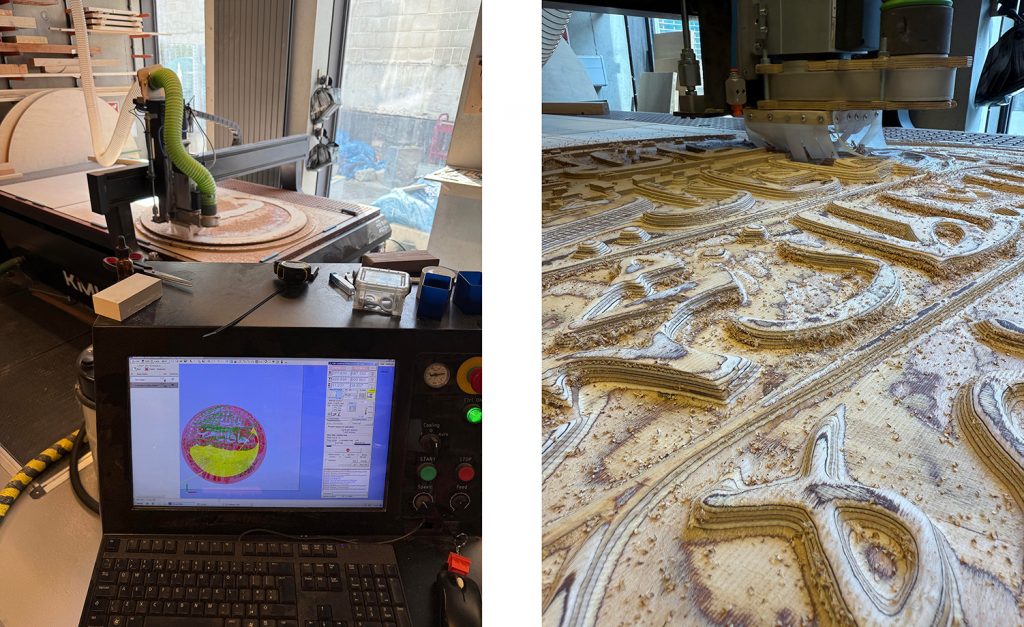
The CNC machine will perform a two-pass subtractive process: a roughing pass with a larger bit to remove the bulk of the material, followed by a finishing pass with a smaller bit for finer details.
The first pass took around 40 minutes, while the second pass took 6 hours to complete.
Finishing
Sand down any rough areas on the carved coin and apply Tung oil to finish the wood.
The CNC process can leave fine tool marks, and rough surfaces; sanding smooths these imperfections, revealing the wood’s true character. Tung oil, a penetrating oil finish applied over 3 days, soaks into the wood fibres, making them appear richer and darker. This brings out the grain and enhances the contrast and visual depth of the wood’s natural pattern.