Introduction
Digimap is an EDINA service that delivers Ordnance Survey Map Data to UK Tertiary Education. Data is available either to download to use with appropriate application software such as GIS or CAD, or as maps generated by Digimap online.
As of Autumn 08 you can locate your area by postcode, place name, co-ordinate, etc then drag a window around your area in the location window. Map data is downloadable as “.gml” files. Using the program InterspOSe from digital mapping company Dotted Eyes you can convert these .gml files into a single, scaled AutoCAD drawings.
Accessing Digimap
First you need to log on to the Student Portal;
http://portal.gre.ac.uk
Then navigate through the following clicks:
My Library and IT [tab]
Electronic databases, electronic journals and e-books [link]
Scroll down to Digimap: Ordnance Survey Collection [link in new window]
Login via UK federation [link]
Select University of Greenwich from the pulldown Home Organisation list and click “select”
Ordnance Survey Collection [link]
Agree to the conditions
Data Download Services [link]
MasterMap Download [link]
Now you can start to specify what data your GML file will contain.
First select what features are to be included, or simply click “Select All” for everything. Then Continue

Next choose your location; you can choose by place name, postcode, grid reference, etc. If you choose place name then the next screen will list a number of possibilities for your name search. Select the one you want and hit continue.

The next screen shows you a map view of your area (this isn’t how your final download will look though). Drag a window around the area on the map that you want – sometimes the drag tool isn’t very precise and you may have to use the tools above the map to navigate around the location plan.

The selected area will highlight pink, if you are happy with the area then hit Continue, another screen shows the area you are about to process. If all is ok, then you can hit the button “Order Request Now”.

Ensure the data format is GZip, GML (this is the default) and hit Extract Data.
The next page is your account page – there is a Retrieve Your Data field in this page. Leave this page open but go and check your University email.
Data Retrieved via Email
The MasterMap download system doesn’t currently give you the data straight away – you must wait for the system to process your request. You will be emailed at your University account twice – the first acknowledging the order, and the second containing a code which links to your file. The acknowledgement email will arrive straight away; the code link will take longer depending on how busy the system is. Digimap state “within 48 hours” but in fact it usually only takes minutes.
In the second email locate the code (it will be a long code, something like this 184c9130f8c411dd43f63824) and copy and paste it into the “Retrieve your Data” field in your Account Page that you left open.
If you closed the Digimap page – or it has taken a long time to receive the email – then you will have to log back into Edina and navigate back through:·
- Home > Data Download Services > MasterMap Download·
- Your Account

Put your code into the Retrieve Code field and hit “Get Data”.
On the next page click the link for the download zip, and save it somewhere like the desktop (you don’t need to keep this file after the translation). Do this carefully; if you download to the wrong place or interrupt the download, Digimap won’t let you have it again and you’ll have to do the area search, etc. all over again.
Extract the Files
The file you have now downloaded is a compressed zip file. You must uncompress it before you can use it for translation. Windows XP can open these zip archives; double click on the compressed file to view the contents of that archive – it will most likely consist of 5 files.

To extract these files to a particular location you can either pull a window around them and drag them to a temporary directory somewhere (e.g. a new folder on the desktop), or select File – Extract All to start the Extraction Wizard. This extracts them to a temporary folder; the file list that appears is the extracted files which can now be used in the next step.
Translate Files
To translate these files to AutoCAD files you can use the software InterspOSe by Dotted Eyes.
Start – Programs – Digimap Translation – Dotted Eyes – InterpOSe (Digimap Edition) Processing
In Interspose you need to click through a series of prompts.
- Next
The first file you are asked for is the order file; point it at the folder you extracted to and double click the file beginning “contents_order…”. - Next
- Next
Process all Files - Next
Pick Output Format as AutoCAD Drawing - Next
Select the version of AutoCAD closest to what you are running (in the University select Release 2007) - Next
- Next
Specify where the translated AutoCAD file will be saved to by clicking the folder icon beside “Folder for output files” and browsing to a suitable location (e.g. your memory stick) - Next
- Next
Ignore ITN - Next
Discard duplicate features - Next
- Finish
Now the translation starts which might take a minute or two, when it’s finished you can hit Exit.
Opening and Scaling in AutoCAD
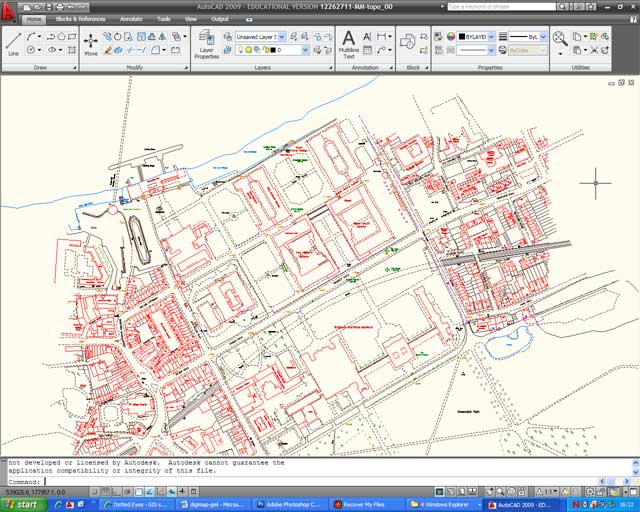
You can now launch AutoCAD and open the file you just generated. In AutoCAD select File – Open and browse to the correct location and open it – it will be called something like “12262711-MM-topo_00”
For AutoCAD Architecture it is usual to draw everything at real size; 1 unit = 1 mm. It’s a good idea to scale your drawing to meet that convention. Digimap Data comes out at 1 unit = 1 metre which is 1000 times too small – meaning the entire drawing should be made 1000 bigger.
To scale everything up by 1000 do the following in AutoCAD:
Type “scale” [enter]
Type “all” [enter]
hit [enter] again
for base point use co-ordinates 0,0
Type “1000” [enter]
Type “z” [enter]
Type “e” [enter]
This is now a 1:1 scaled drawing (though to be sure you can use the “dist” command to measure the distance between two known points to check this).